Melted Crayon Christmas Ornaments
Melted crayon Christmas ornaments are a colorful, hands-on way to bring the holidays to life for little ones. Kids love watching the crayons melt and swirl into something new—it feels a little like magic and a lot like Christmas.
This easy project turns broken crayons into bright, one-of-a-kind decorations, making it a favorite in our list of Christmas activities for preschoolers. You don’t need fancy supplies or special tools—just clear ornaments, old crayons, and a bit of creativity.
As kids help choose colors, peel wrappers, and watch the transformation, they’re also building fine motor skills and exploring color mixing in a joyful, low-pressure way. It’s a cozy craft that celebrates both the season and the sweet, messy magic of making things together.
Quick Look: Melted Crayon Ornaments
Age Range: Preschool and up
Prep Time: 5 minutes
Activity Time: 15–20 minutes
Skills: Fine motor, color recognition, creativity
Mess Level: Low (adult help for heating)
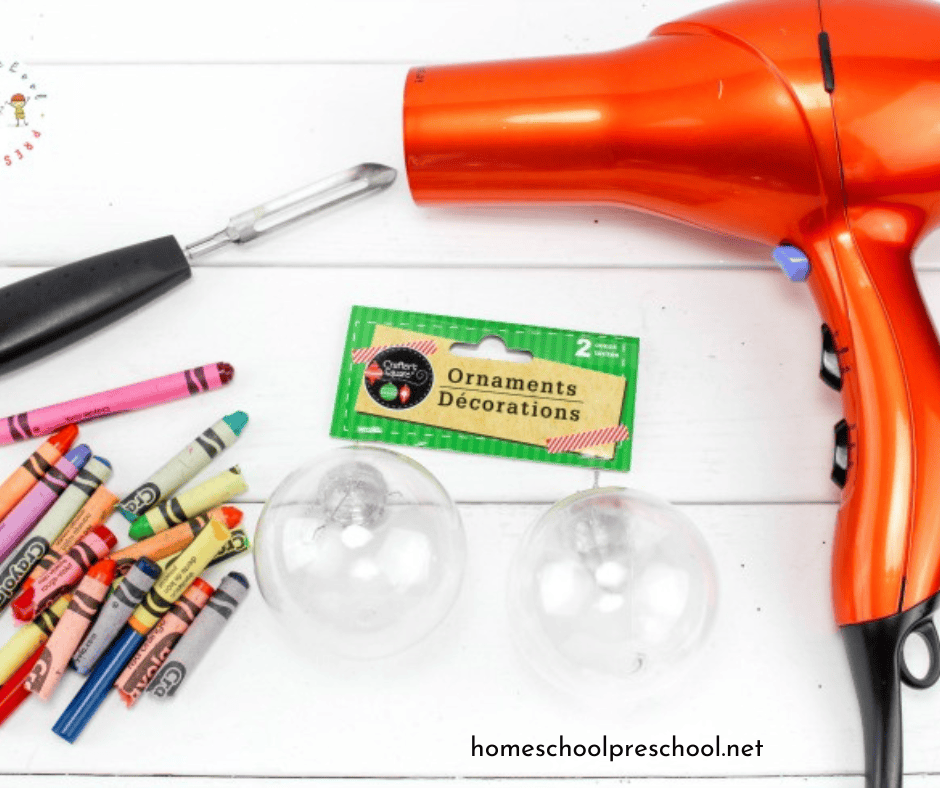
You’ll Need: Clear plastic ornaments, broken crayons, hair dryer, craft knife or sharpener, towel or oven mitt
Perfect For: Classroom crafts, playdates, or cozy family afternoons
Melted Crayon Christmas Ornaments
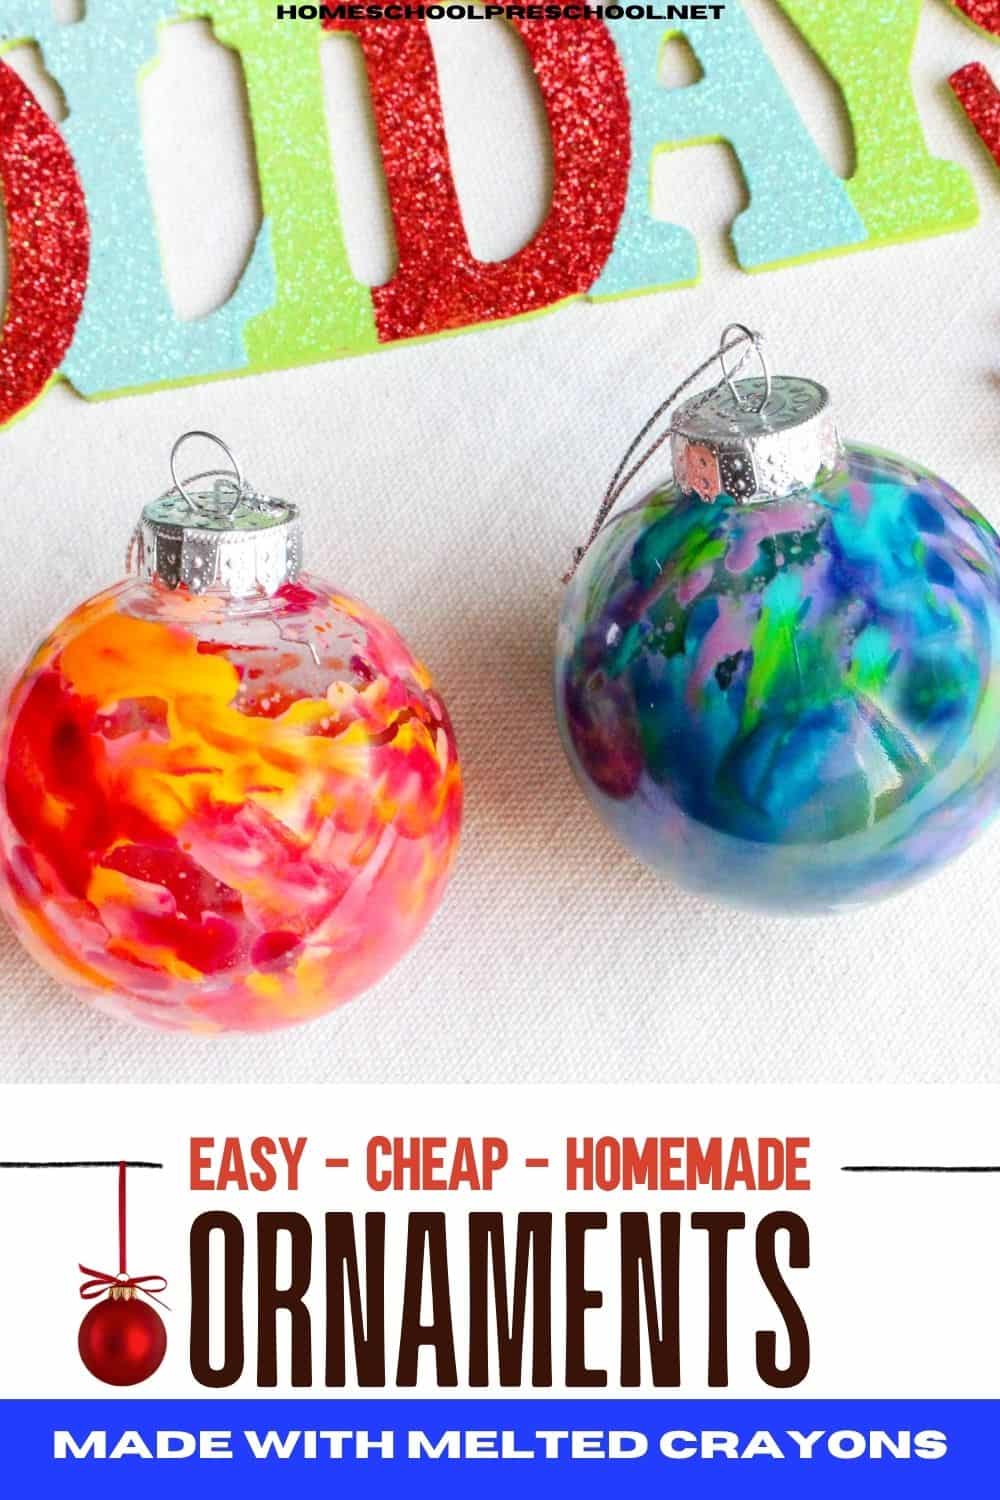
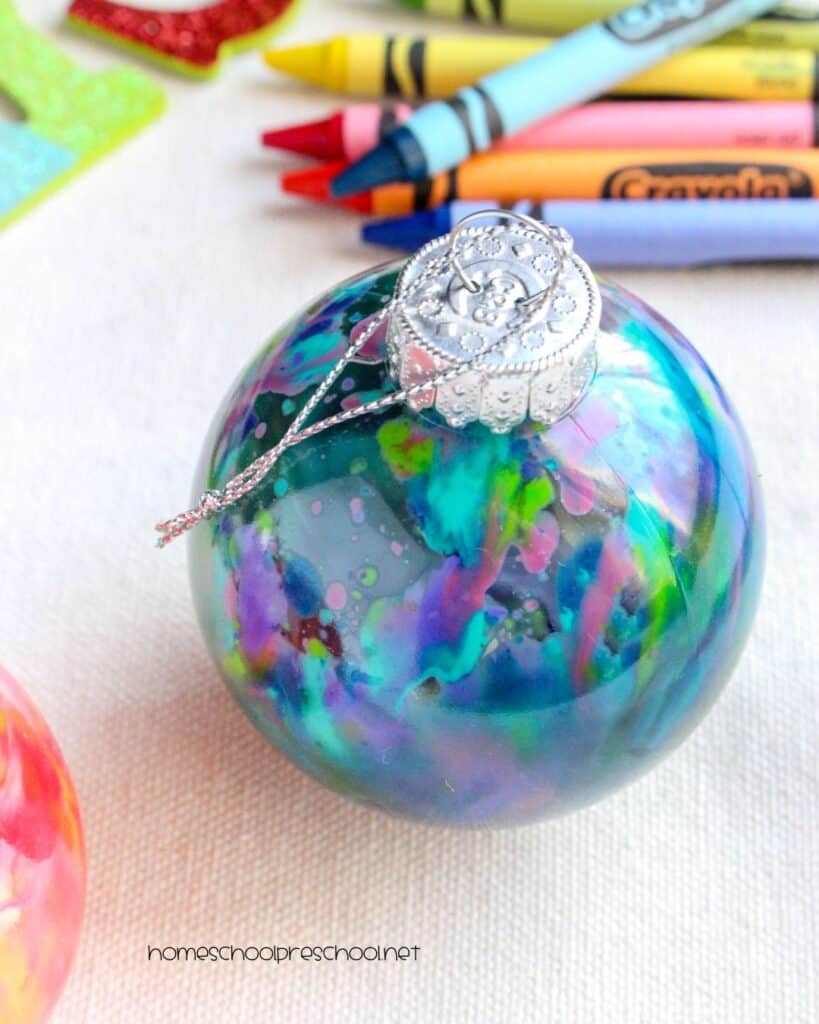
Once you’ve gathered your supplies, it’s time to bring the idea to life. Kids can help choose their favorite crayon colors, break them into pieces, and drop them inside the ornaments. With a little heat and patience, those bits of wax melt together into something bright, swirled, and completely unique—just like the kids making them.
What You’ll Need
- clear plastic bulbs
- broken bits of crayons in various colors
- vegetable peeler
- hair dryer
- oven mitt (to protect little hands)
Melted Crayon Ornaments
Let’s get started on making these vibrant, memorable ornaments. Whether you have a box of old crayons lying around or decide to use brand-new ones, this project will transform them into something magical.
This section will guide you through the easy steps to create your own melted crayon ornaments. So, gather your crayons and let’s add a pop of color to your Christmas tree this year!
To get started on this project, cover your space with newspaper or a messy mat. This will protect your space from crayon drippings.
Have your child select four or five crayon pieces for each bulb they’d like to make. Then, peel the paper off each of them.
Now, with adult supervision, use a vegetable peeler or cheese grater to scrape some broken crayons. Collect all of the little bits on a paper plate. You’ll need about two teaspoons total of all the colors for each of these easy melted crayon ornaments.
Using a vegetable peeler or cheese grater is a great motor skill building activity for kids. However, if they get frustrated, feel free to take over this step for them.
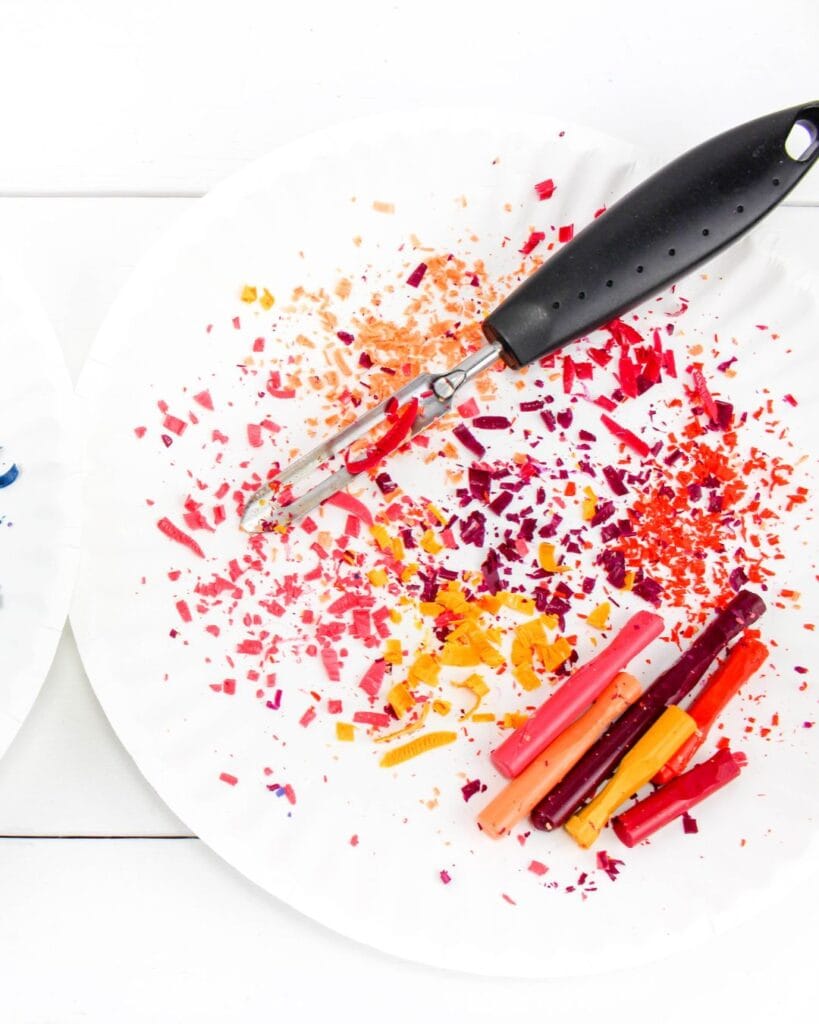
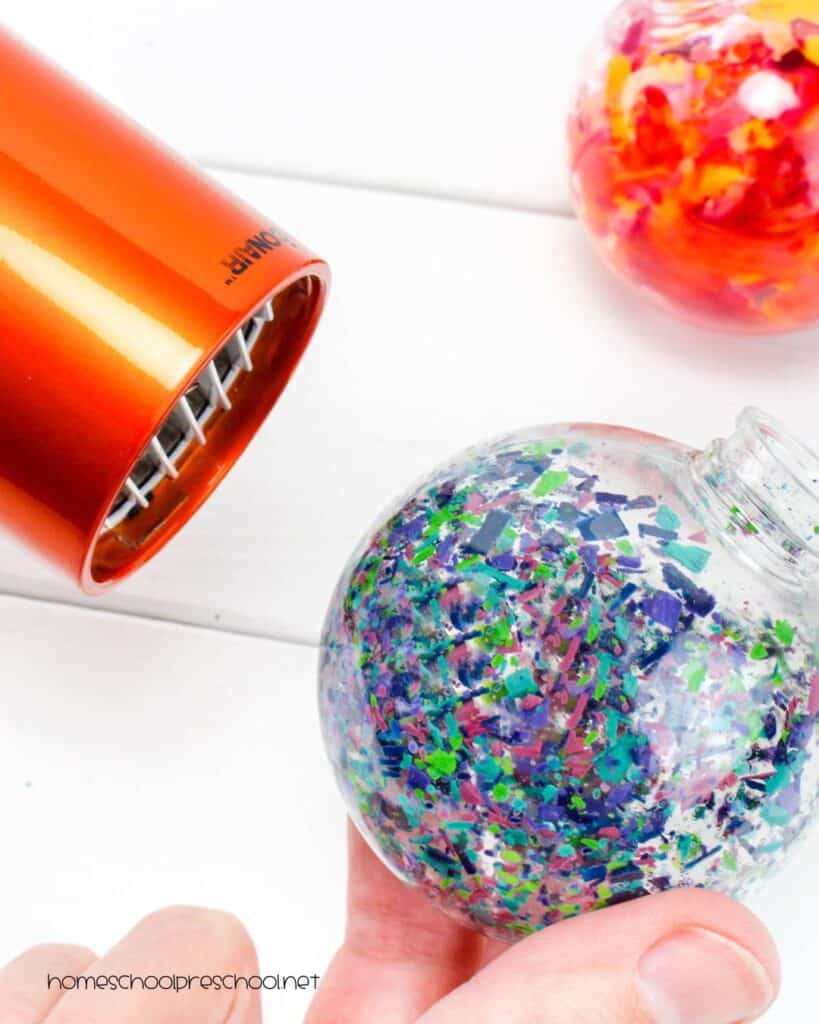
When you have enough shavings, fold the paper plate in half and pour the shavings into clear glass ornaments. (You can use plastic ornaments, but they may dimple with the heat of the dryer.) Put the ornament hook back on the top of the ornament.

Now, turn the hair dryer on the low setting. Point the hair dryer at the ornament while slowly turning it around to heat all of the crayon shavings.
NOTE: For younger kids, I suggest having them control the blow dryer while you maneuver the ornaments. This way, their little fingers won’t get too hot to hold the ornaments.
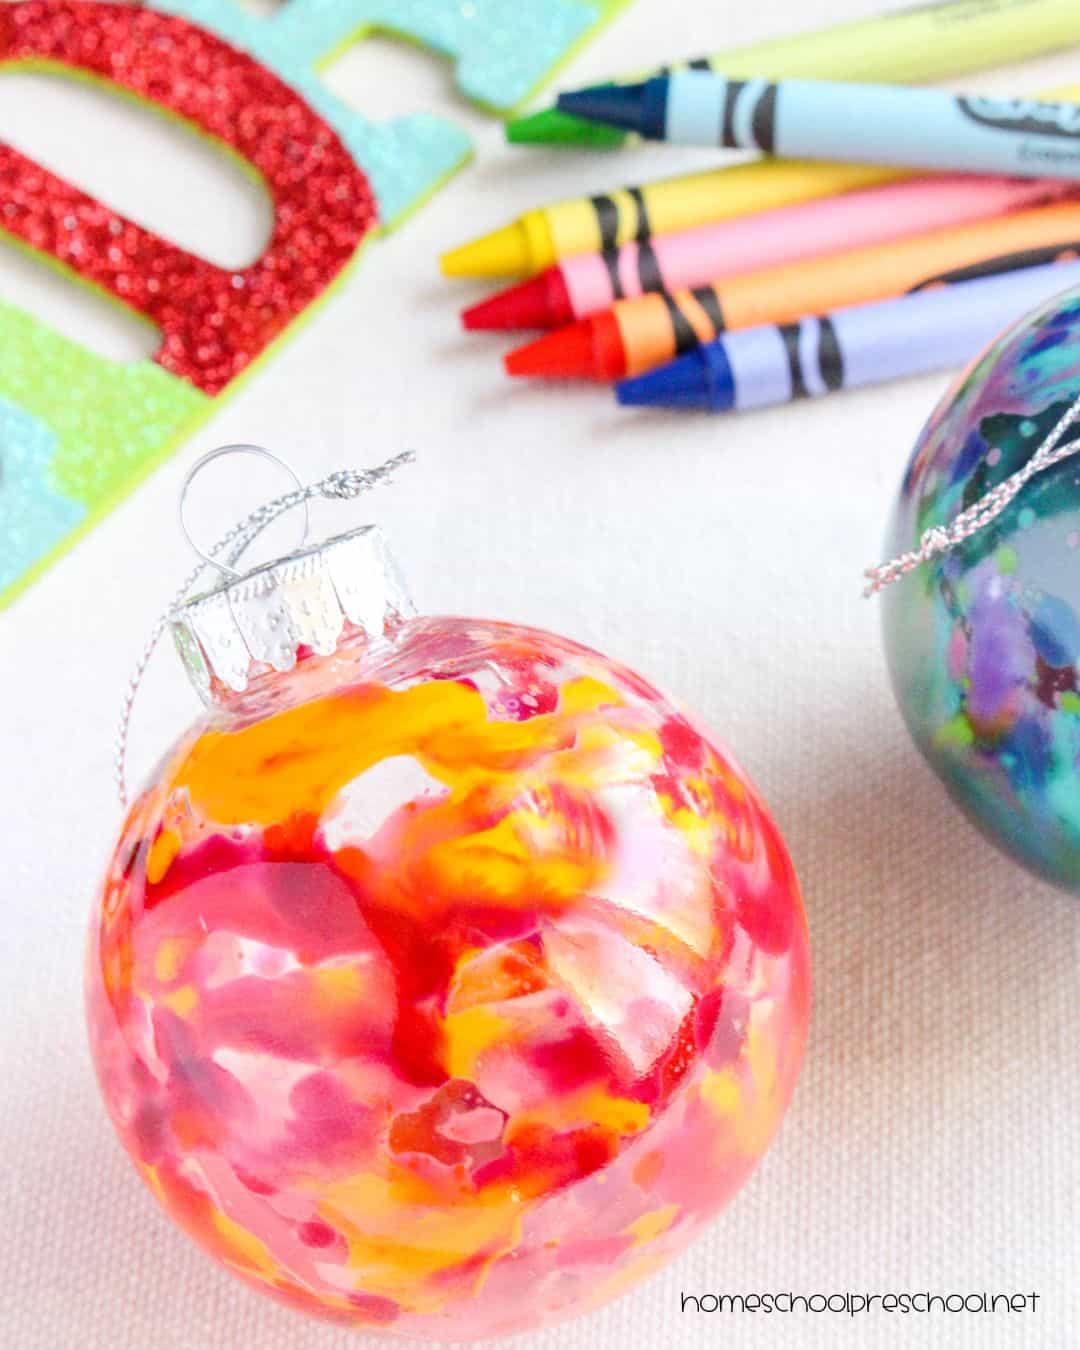
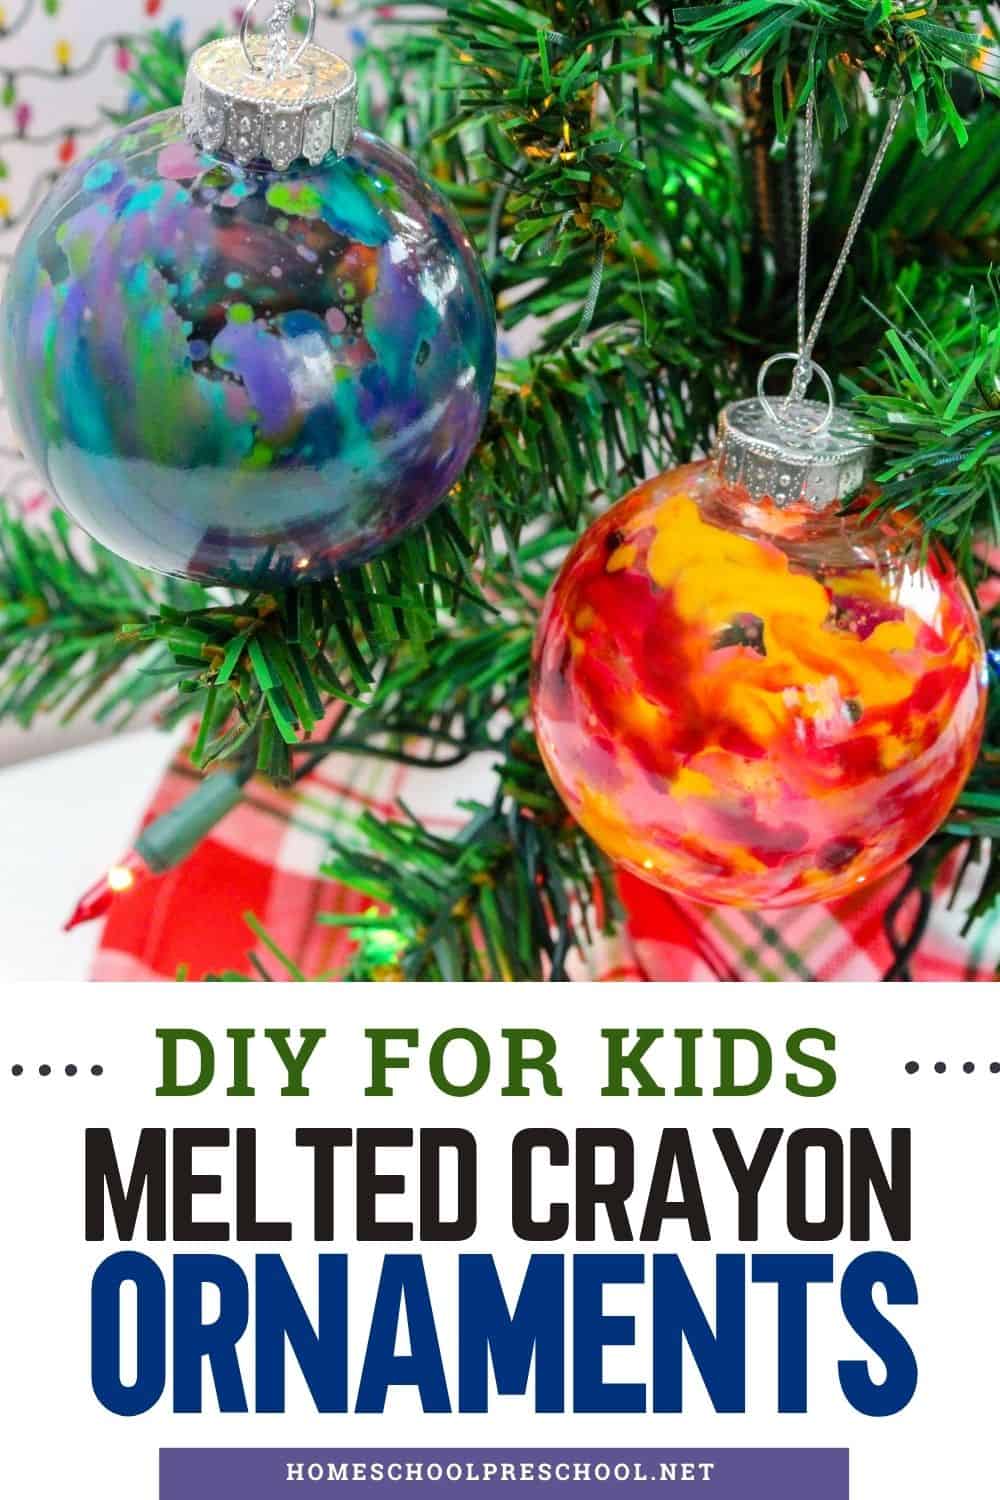
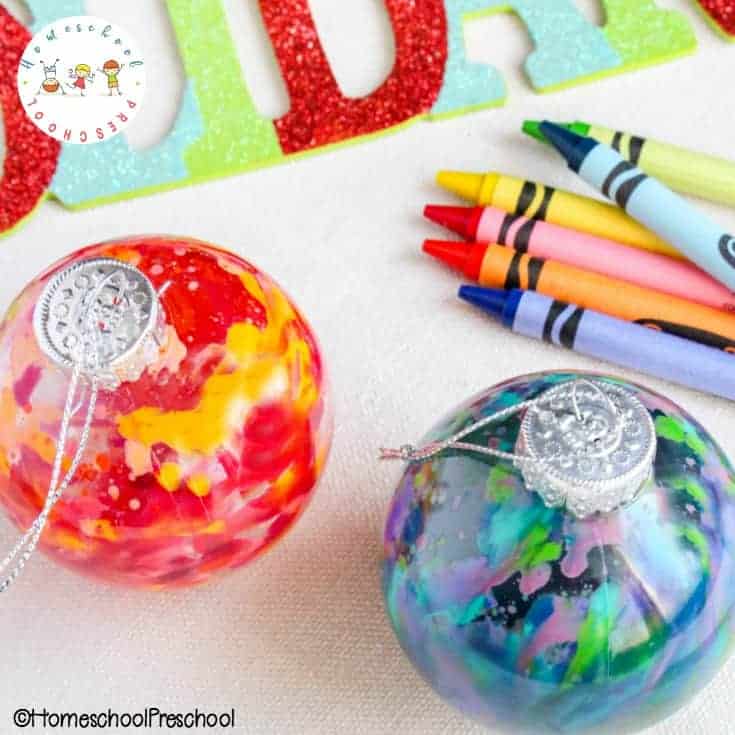
Once the ornament has cooled, it’s ready to hang on the tree! That’s it.
These handmade ornaments are so easy to make, and they will make a beautiful addition to your Christmas tree.
Adding Decorative Elements to the Ornaments
You can add decorative elements to the homemade Christmas ornaments for extra creativity by using items such as sequins, glitter, ribbons and beads.
Have your kids thread beads and sequins onto a string of ribbon to create a unique design. Different colors of glitter can also be added to the melted crayon wax in the ornament.
Tips for Success
Melt safely: Use a low heat setting on the hair dryer and hold the ornament with a towel or oven mitt to protect little hands. Rotate it slowly so the wax spreads evenly.
Pick winning color combos: Stick with 2–3 shades in the same color family (like red, pink, and white) for a swirled look that shines. Too many colors can blend into brown.
Avoid muddy colors: Skip mixing opposites like green and red or purple and yellow inside one ornament. Instead, make a few separate ornaments so kids can experiment without turning everything grayish.
Let them cool completely: Set the ornaments aside on a towel until fully cooled before adding caps or hanging them on the tree.
Display & Gift Ideas
Hang these colorful ornaments on your Christmas tree or string them across a window where the light can shine through the swirls.
They also make sweet, simple gifts—kids can tuck one into a teacher’s mug, wrap a few for grandparents, or tie them onto presents as handmade tags.
For a personal touch, add a year label or a tiny name tag so each ornament becomes a keepsake to unwrap again next December.
FAQ: Melted Crayon Christmas Ornaments
A hairdryer works well for melting crayons inside clear ornaments, as it’s safe and easy to control. You can also place small pieces of crayons in the ornaments and carefully heat them with a warm water bath or heat gun under adult supervision.
Plastic ornaments are a safer option for preschoolers. Look for heat-resistant ones to ensure they won’t warp when crayons are melted inside.
Lay down a disposable tablecloth or use a crafting tray. Have kids wear smocks or old clothes, and keep wet wipes handy for quick cleanup.
Making this fun Christmas craft is a great holiday activity to do with your young children. Not only will it provide hours of entertainment, but the end result is beautiful decorations that everyone can enjoy!
Just gather a few simple materials, let your imagination run wild, and create wonderful keepsakes that you and your kids will cherish for years to come. And don’t forget about adding decorative elements like sequins, glitter, ribbons, and beads for extra creativity!
So this holiday season why not try making these unique ornaments together as a family? You won’t regret it!
Melted Crayon Christmas Ornaments
Equipment
- Pencil sharpener or cheese grater (to create crayon shavings)
- Hairdryer or heat gun (for melting)
- Protective table covering (e.g., newspaper or a disposable tablecloth)
- Smocks or old clothes (to keep kids clean)
- Small bowls or containers (for sorting crayon shavings)
Materials
- Clear plastic or glass ornaments preferably heat-resistant
- Crayons various colors
- Ribbon or string for hanging ornaments
Instructions
- Cover your table with a protective cloth or newspaper to catch any mess. Set out all materials within easy reach for the kids.
- Let the kids pick a few colors they’d like to use for their ornament. Encourage them to experiment with combinations!
- Make small crayon shavings with a pencil sharpener or cheese grater. For easy selection, you can place the shavings in separate bowls or piles by color.
- Open the top of the clear ornament and sprinkle in the crayon shavings. Kids can layer the colors for a fun striped effect or mix them for a more blended look.
- With an adult's help, use a hairdryer or heat gun to heat the outside of the ornament gently. Rotate the ornament while heating to distribute the melted crayon evenly and create a swirl effect.
- Allow the ornament to cool completely before replacing the top. Ensure the ornament is securely closed.
- Tie a festive ribbon or string to the top of the ornament so it’s ready to hang on the tree.
- Hang the ornaments on your Christmas tree or give them as handmade gifts to spread holiday cheer!

Tara is the brains behind Homeschool Preschool, where her journey from preschool and public school teacher to homeschooling mom of three fuels her passion for early childhood education. With a blend of expertise and firsthand experience, Tara’s writings offer practical tips and engaging resources to support families in creating meaningful learning adventures at home.
I found that using a vegetable peeler or grater is difficult/frustrating and very time consuming. A pencil or crayon sharpener is a much better alternative, and the resulting curls can easily be broken up. Thanks for the fun craft.
Thanks for the tip!