Muffin Cup Spring Flower Craft for Preschoolers
This spring flower craft checks every box for simple preschool spring crafts. It takes about ten minutes start to finish, works great for ages 3–5, and uses supplies you likely already have sitting in a drawer.
No cutting. No templates. No last-minute craft store run.
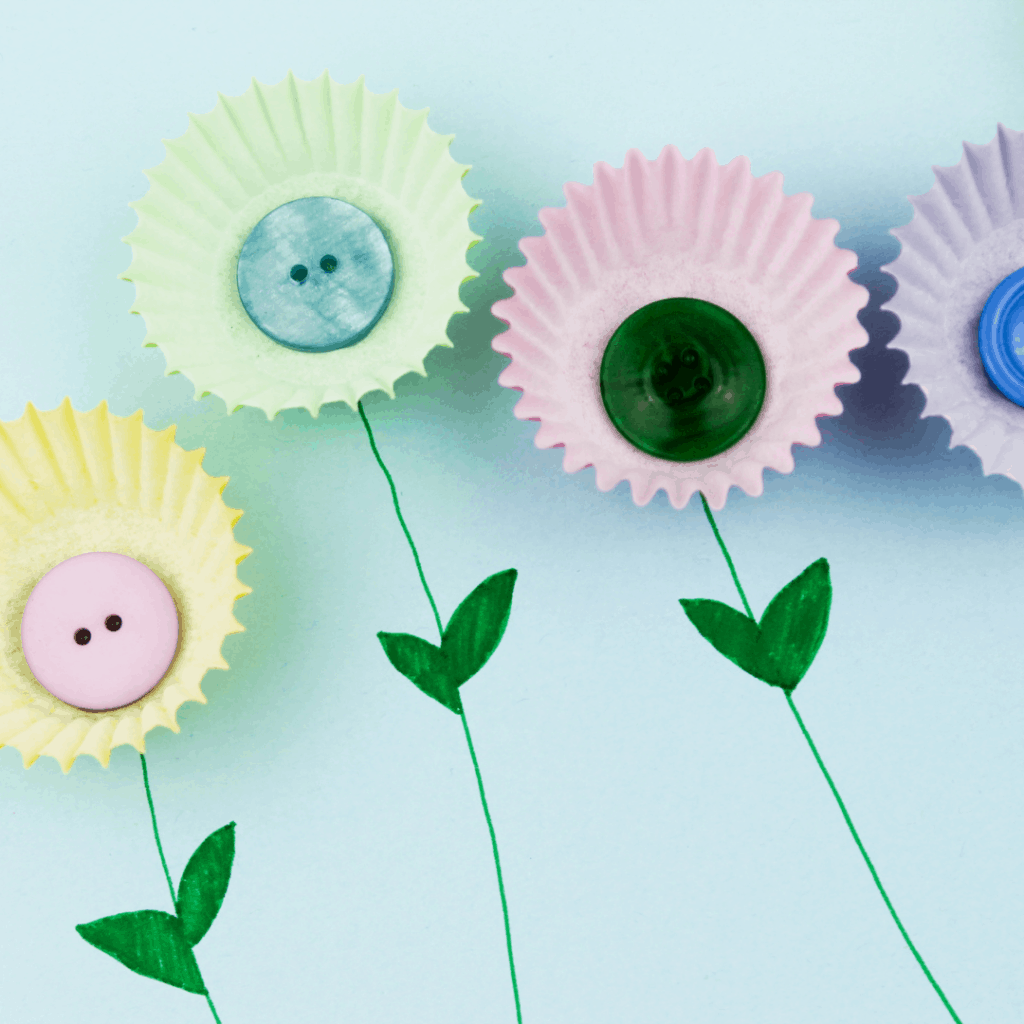
Just mini cupcake liners, a few buttons, some cardstock, and a green marker. Your child places the liners, glues them down, draws the stems, and presses a button into the center of each flower. The ruffled edges of the cupcake liner do all the work — they look exactly like flower petals without any shaping required.
Simple to set up. Easy to do together. And it actually looks great when it’s done.

Why This Craft Works for Preschoolers
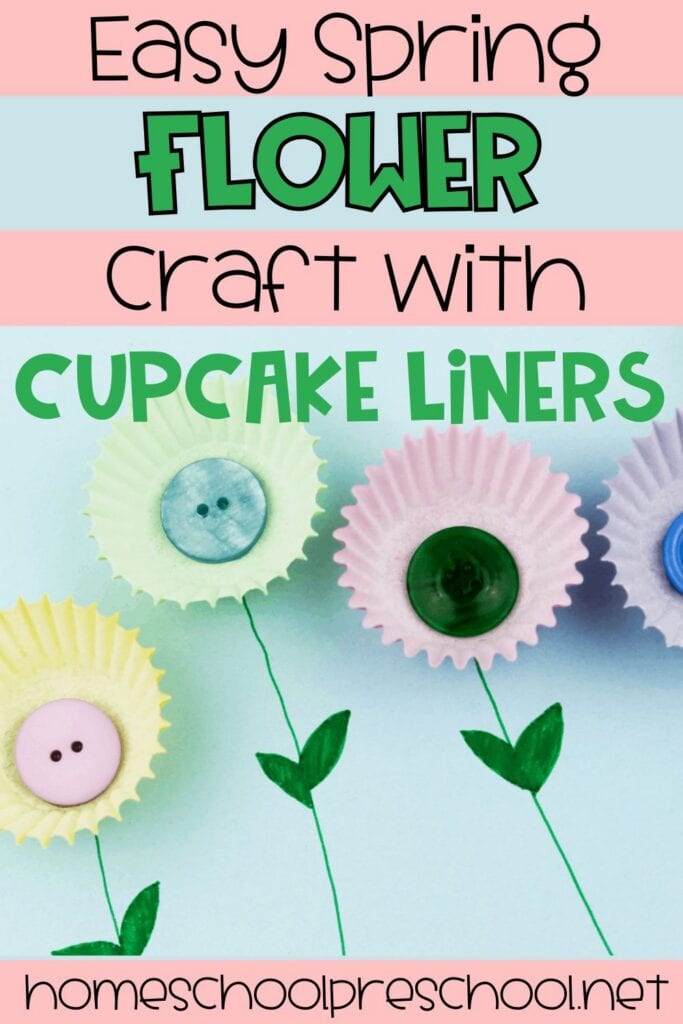
The ruffled edges of a mini cupcake liner look exactly like flower petals — no shaping or cutting required. Kids place them on paper, glue them down, draw a stem, and press a button in the center. That’s the whole craft.
While it feels like pure fun, your child is actually working on a few real skills:
- Fine motor skills — pressing buttons into glue, holding a marker to draw stems
- Hand-eye coordination — placing the liner and button exactly where they want them
- Color recognition — choosing which liner and button go together
- Creative decision-making — there’s no wrong way to arrange the flowers
Preschool Cupcake Liner Flowers
This cupcake liner flower craft is as simple as it looks. Kids arrange the liners on cardstock, glue them down, draw a stem, and press a button in the center. The ruffled edges do all the work, so every flower turns out looking great with zero frustration.
What You’ll Need
Five supplies. Most are probably already in your kitchen or craft bin.
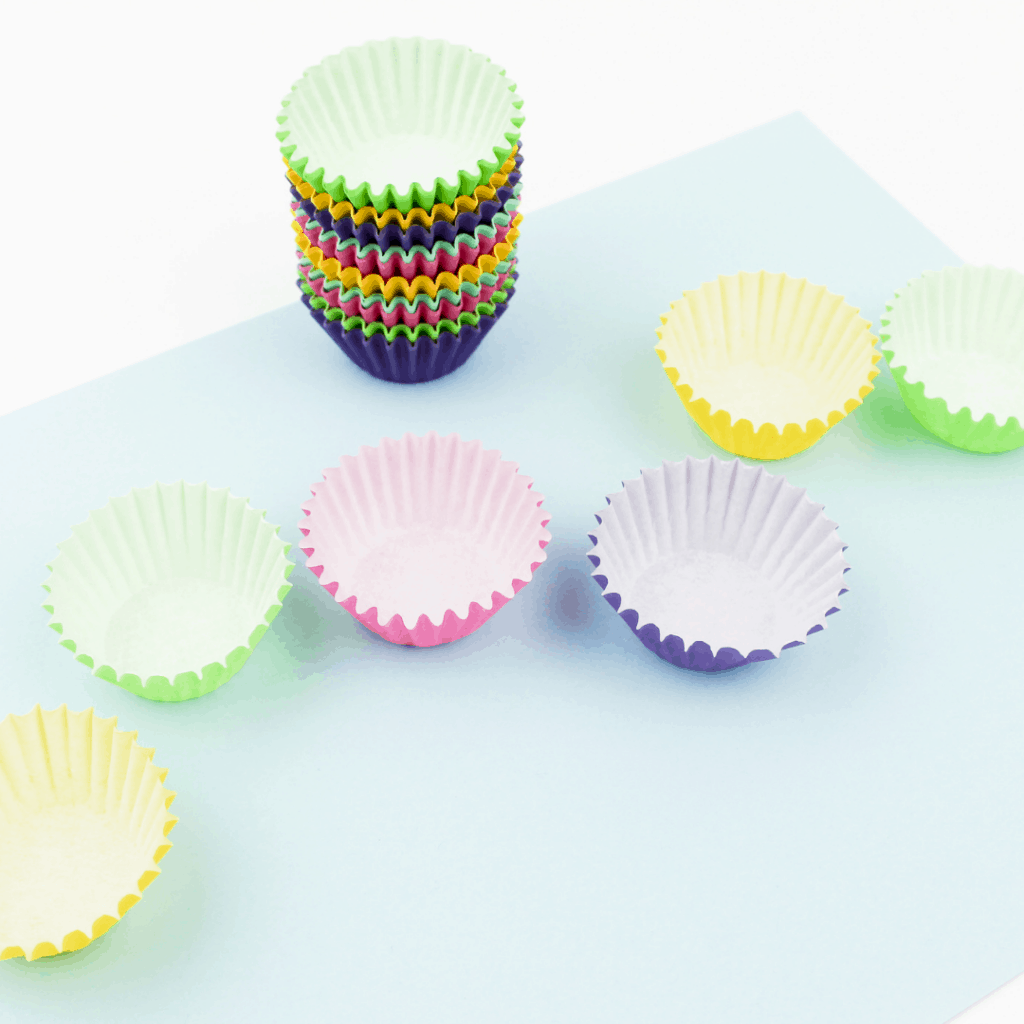
- Blue card stock paper
- Mini baking cups (variety of colors)
- Elmer’s clear glue
- Buttons (variety of colors)
- Green marker


Tip: Mini baking cups work better than standard size for this age. They’re easier for little hands to manage, and they look more like real flowers on the paper.
How to Make Cupcake Liner Flowers
This craft takes about 10 minutes from start to finish, plus drying time.
Step 1: Arrange the cupcake liners.
Have your child place the liners on the cardstock wherever they’d like their flowers. Leave space below each one for the stem. Let them decide how many flowers, which colors, and how to arrange them.
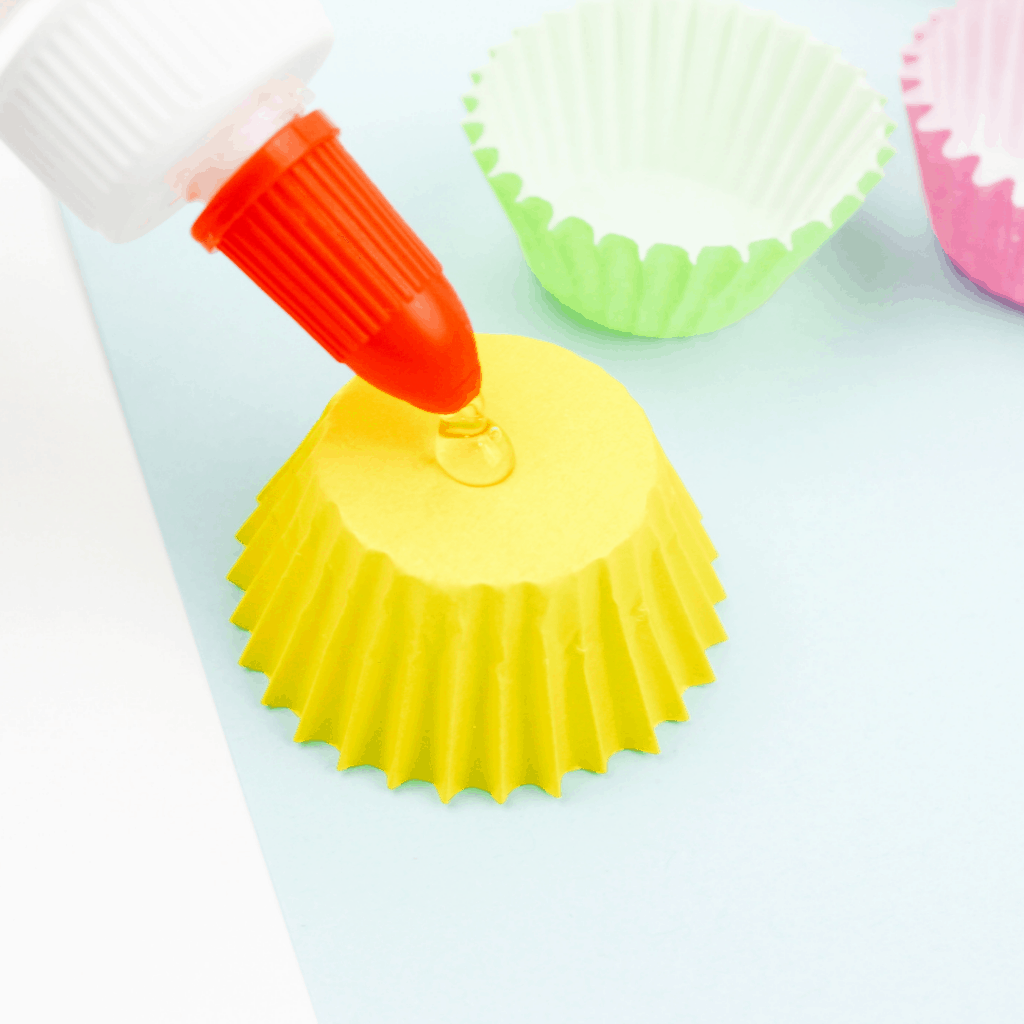
Step 2: Glue the liners down.
Put a dot of clear glue on the back of each liner and press it firmly onto the paper. Clear glue works best. It dries without visible residue, so the finished craft looks clean.
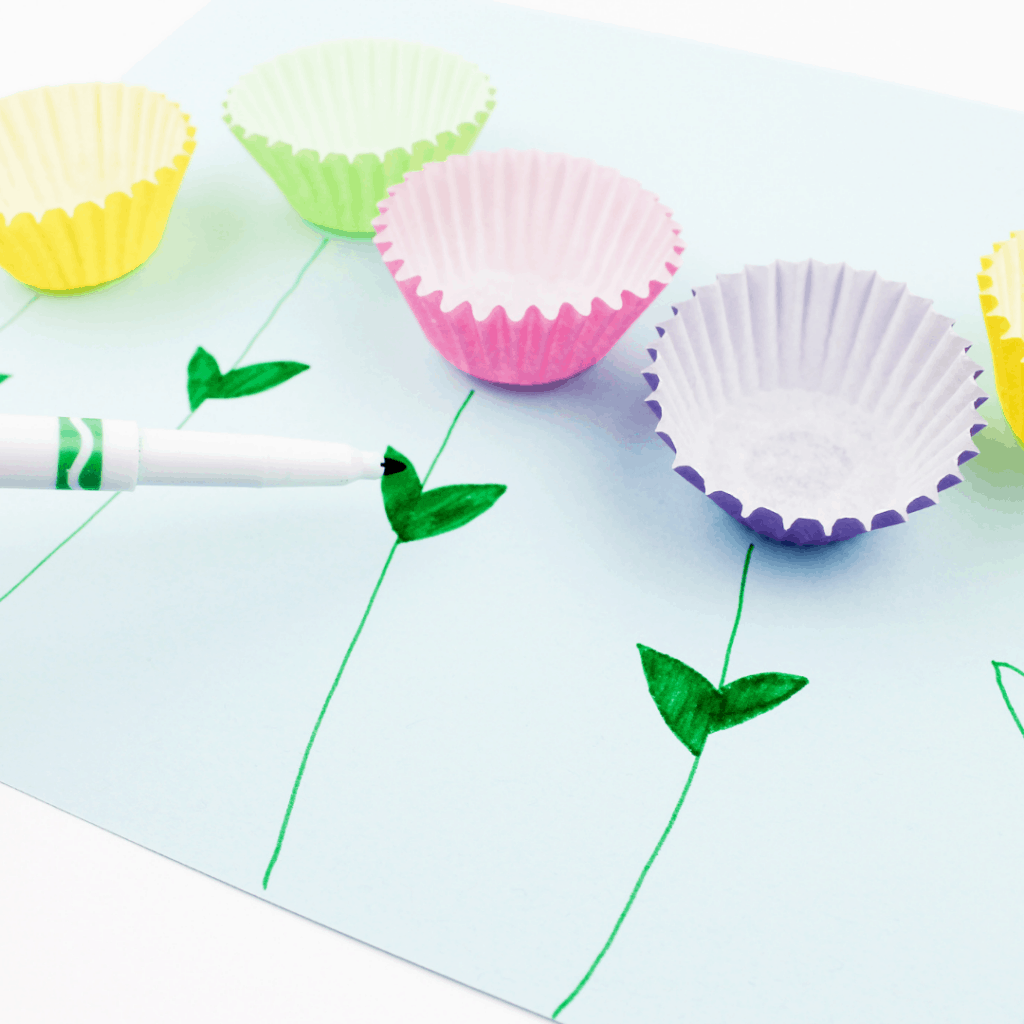
Step 3: Draw the stems and leaves.
Using the green marker, draw a stem down from the center of each flower and add a couple of simple leaves. Kids can do this part themselves — it doesn’t need to look perfect to look great.
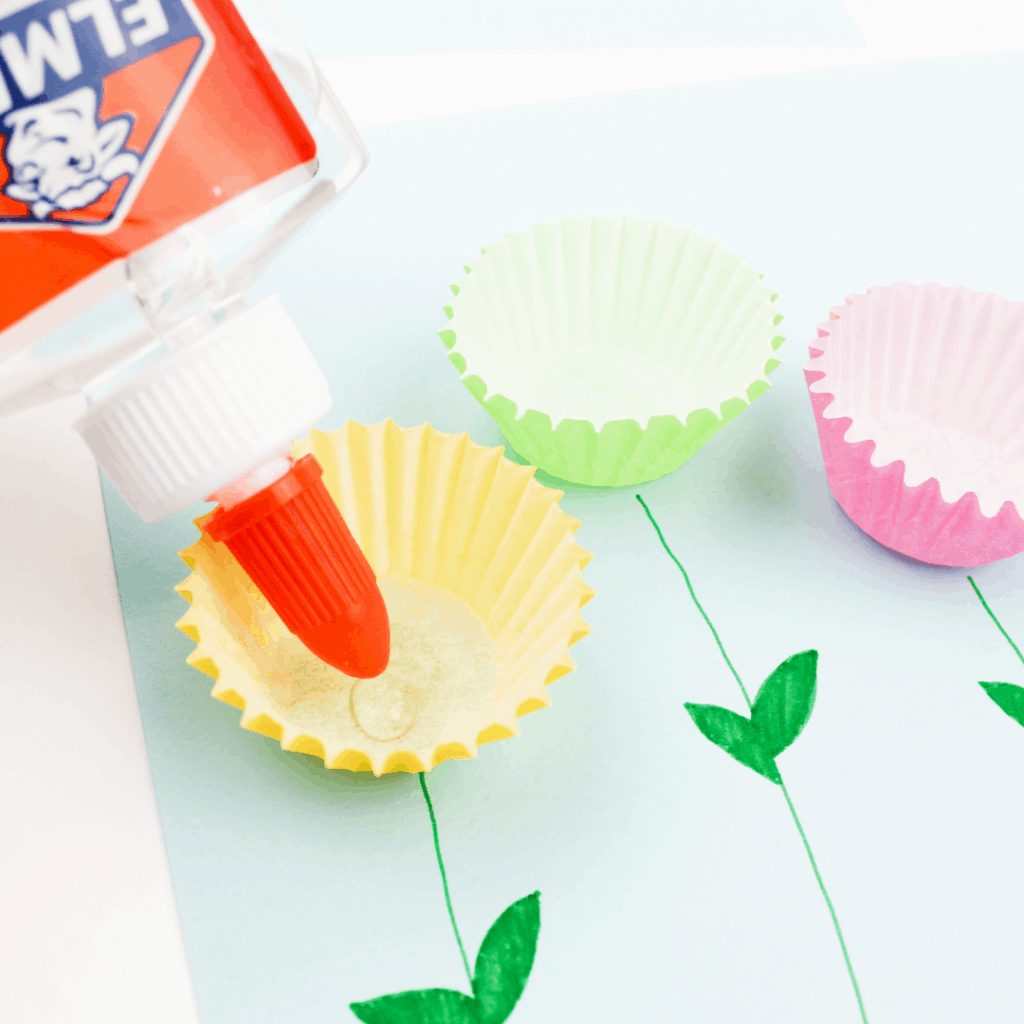
Step 4: Add the button centers.
Put a dot of glue inside each cupcake liner and press a button into the center. Let your child pick which button goes on which flower. Mixing and mismatching colors is half the fun.
Step 5: Let it dry.
Set the craft aside until the glue is fully dry, then it’s ready to display.
Set the project aside to dry. Once it’s dry, it’s ready to be put on display!
Is This Right for Your Child’s Age?
This craft works well for ages 3–5. Here’s how to adjust it:
Age 3: You handle the glue and drawing. Let them place the liners and choose the buttons.
Age 4: They can do most steps with light guidance on the glue.
Age 5: Most kids can complete this independently, start to finish.
Ways to Extend the Learning
If your child wants to keep going, try these simple add-ons:
- Count the flowers together before and after gluing
- Sort the buttons by color or size before choosing
- Name the colors of each liner and button as you go
- Read a book about flowers or spring afterward to connect the craft to the season
More Spring Activities for Preschool
Looking for more simple spring ideas? Try these:
[Link to your spring ideas roundup post]
[Link to a related printable or activity]
Grab the printable version.
Want to take this to the table without your phone? Grab the printable version here.

This spring flower craft is one of those activities that looks like you planned it, but took almost no time at all. A few cupcake liners, some buttons, and a green marker, and your preschooler has something to be proud of.
That’s the kind of learning that works in real life. Not a Pinterest project that sits unfinished on the counter. Just a simple, doable craft that your child can complete in one sitting and actually enjoy.
If your 3–5 year old needs more spring activities to round out your week, grab our spring printables to pair with this craft. A couple of worksheets, a book, and this activity is a full morning without any extra planning on your end.
You don’t have to do more to make it count. This is enough.

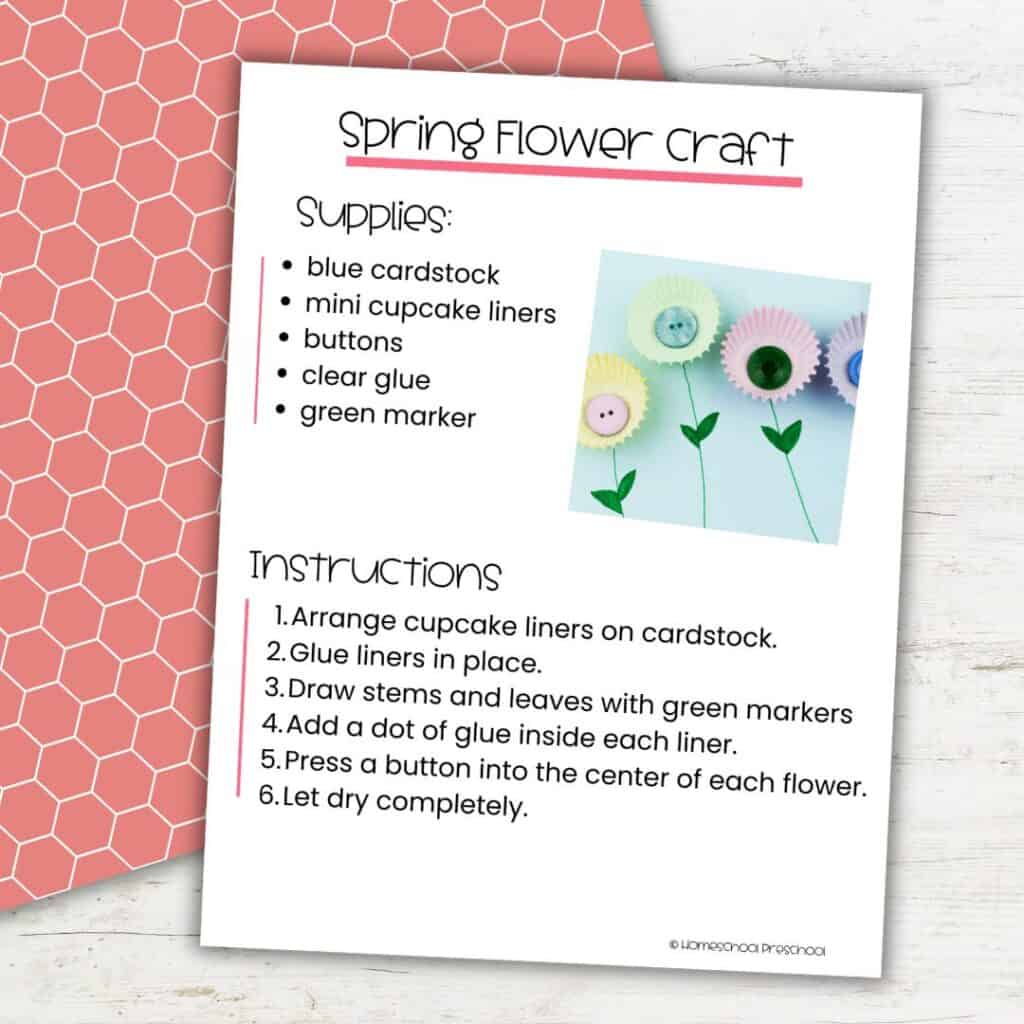
Muffin Cup Spring Flower Craft
Materials
- blue cardstock
- cupcake liners
- buttons
- clear Elmers glue
- green Crayola Bold & Bright marker
Instructions
- Gather materials for this fun craft.
- Arrange cupcake liners on cardstock.
- Glue liners in place.
- Draw stems and leaves with green markers.
- Add a dot of glue inside each liner.
- Press a button into the center of each flower.
- Let dry completely.

Tara is the brains behind Homeschool Preschool, where her journey from preschool and public school teacher to homeschooling mom of three fuels her passion for early childhood education. With a blend of expertise and firsthand experience, Tara’s writings offer practical tips and engaging resources to support families in creating meaningful learning adventures at home.