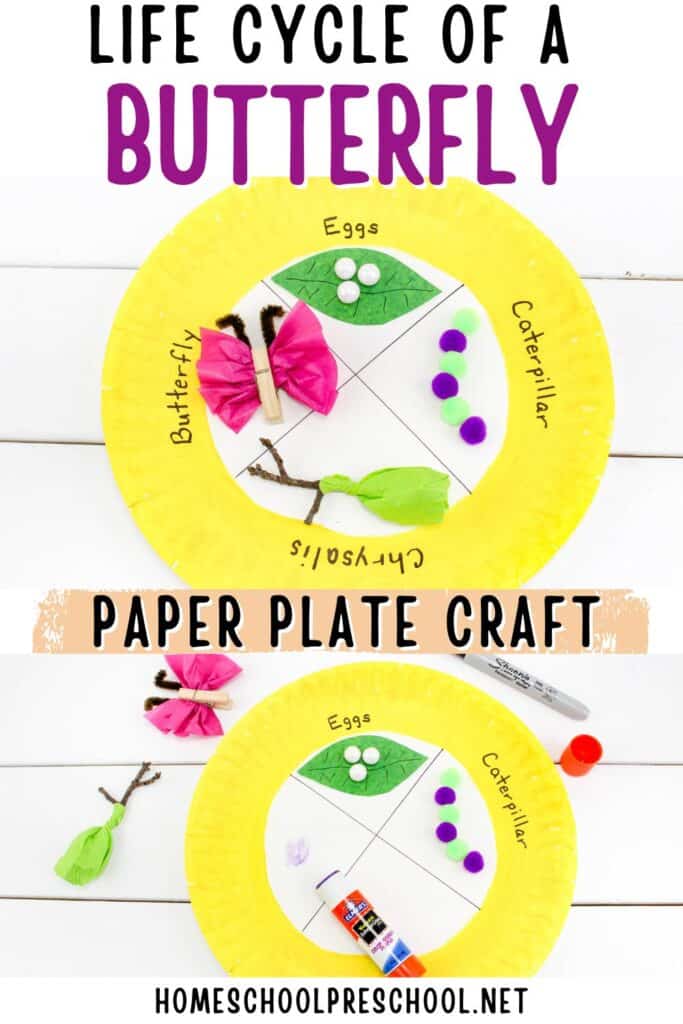
Life Cycle of a Butterfly Craft
Butterflies are fascinating creatures, and learning about their life cycle is always a hit with young kids! This life cycle of a butterfly craft is the perfect way to bring science to life in a hands-on, creative way.
Whether you’re a teacher or a parent, this activity is an engaging way to teach little ones about the amazing transformation from caterpillar to butterfly. Plus, it pairs perfectly with other life cycle activities for preschool, making it a great addition to your lesson plans. Kids will love making their own colorful butterflies while building fine motor skills and exploring nature’s wonders.
This craft combines learning and creativity, making it a win for kids and adults alike. Whether you’re at home or in the classroom, it’s a fun way to explore the magic of butterflies together! Let’s dive into the details so you can get started.
Life Cycle of a Butterfly Craft
This butterfly life cycle project is a fantastic way to combine creativity and science. It’s perfect for teaching kids about the stages of a butterfly’s development while giving them a chance to work on essential skills like cutting, gluing, and sequencing.
With a few simple supplies, children can make a vibrant and interactive craft that reinforces their learning and keeps them excited about nature.
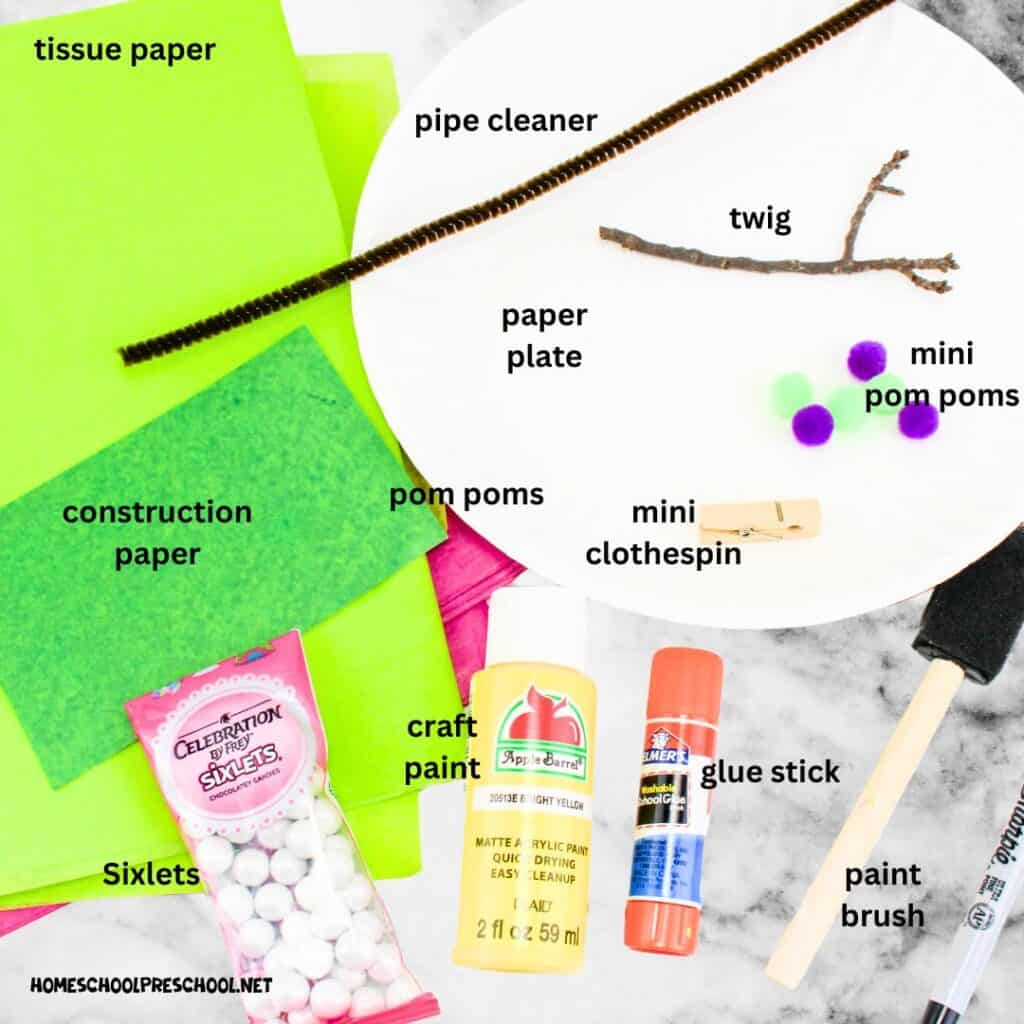
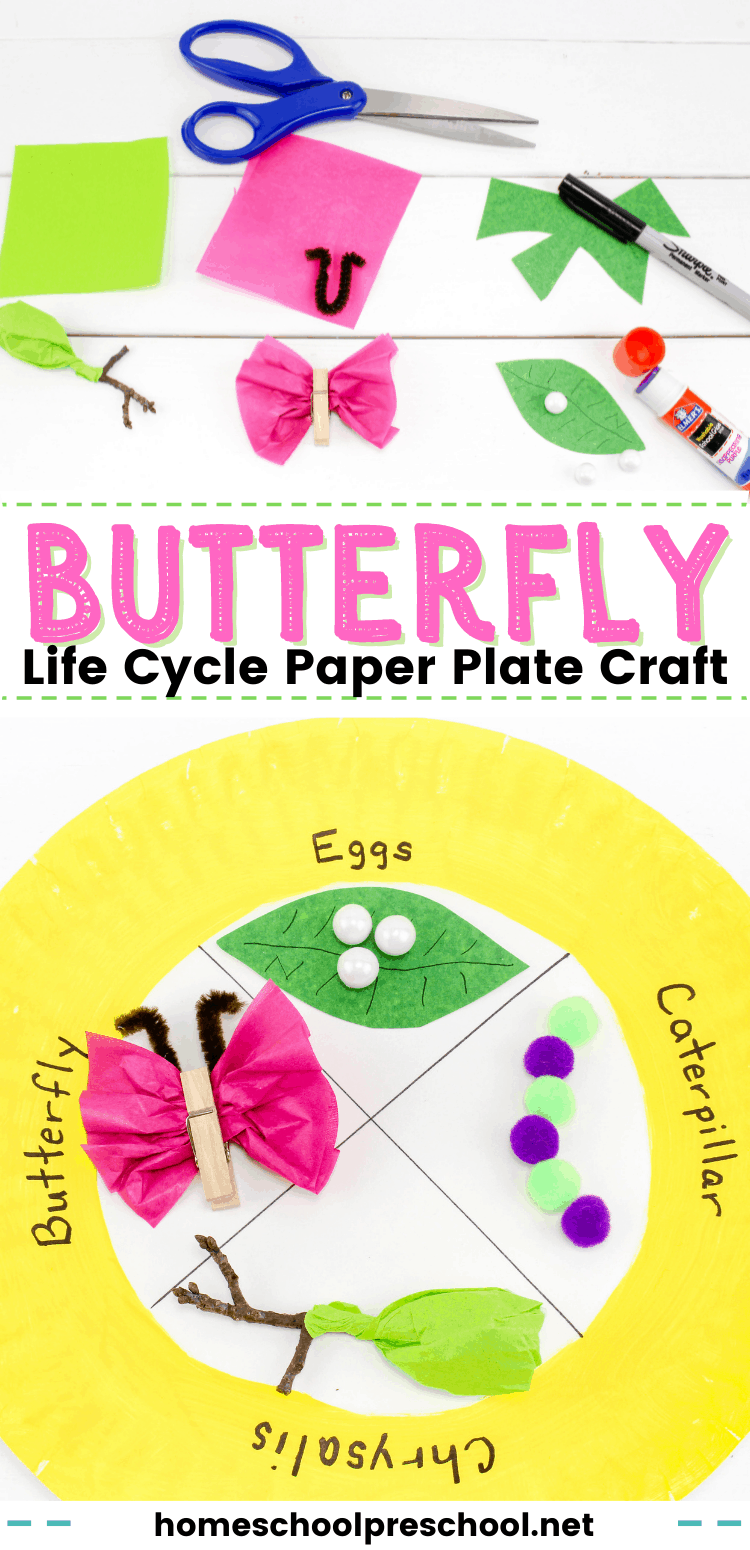
Materials Needed:
- Paper plate
- Craft paint (any color)
- 1 brown pipe cleaner
- 1 mini clothespin
- 1 small stick (from your yard)
- 6 green mini pom poms
- Green construction paper
- Tissue paper (light green and pink)
- 3 white sixlets (small chocolate candies)
- Glue stick
- Black Sharpie
This craft turns learning into a hands-on adventure! Kids will love seeing the stages of a butterfly come alive as they create each one. Not only is it fun, but it’s also an excellent tool for engaging and meaningful science teaching.
What You’ll Do:
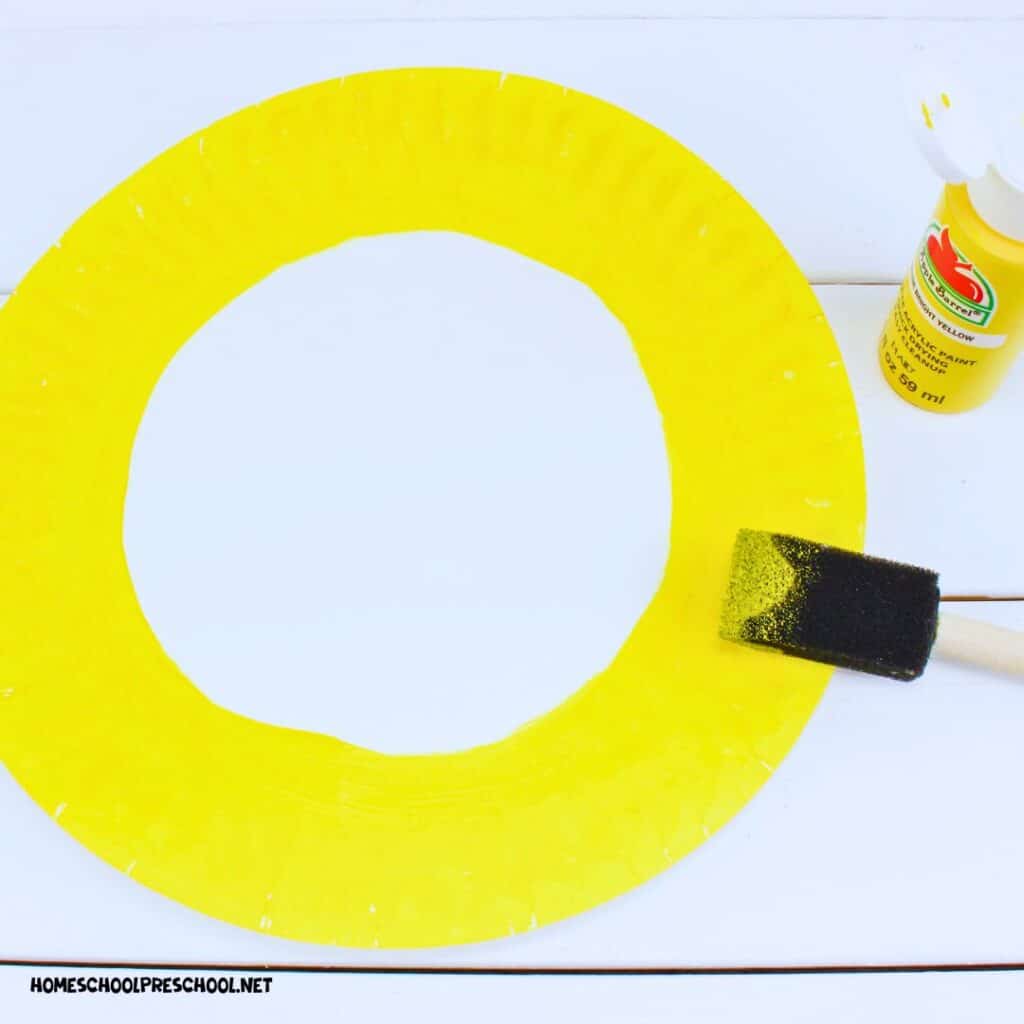
Paint the entire outer rim of the inside of the paper plate. Leave the middle part white for the life cycle parts. Let the paint dry.
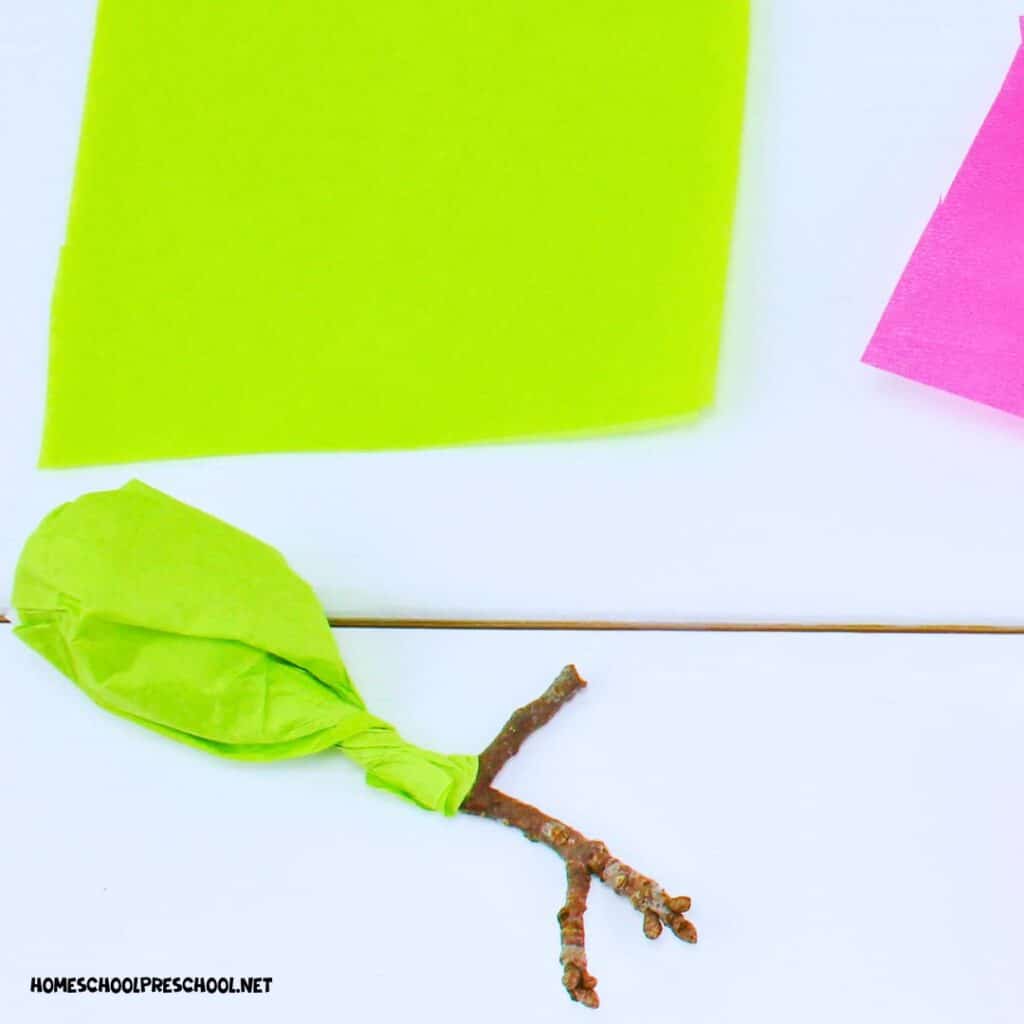
For the chrysalis: Cut a small square of dark green tissue paper. Form it into a cocoon shape over one end of the stick. Twist it so it closes around the stick.
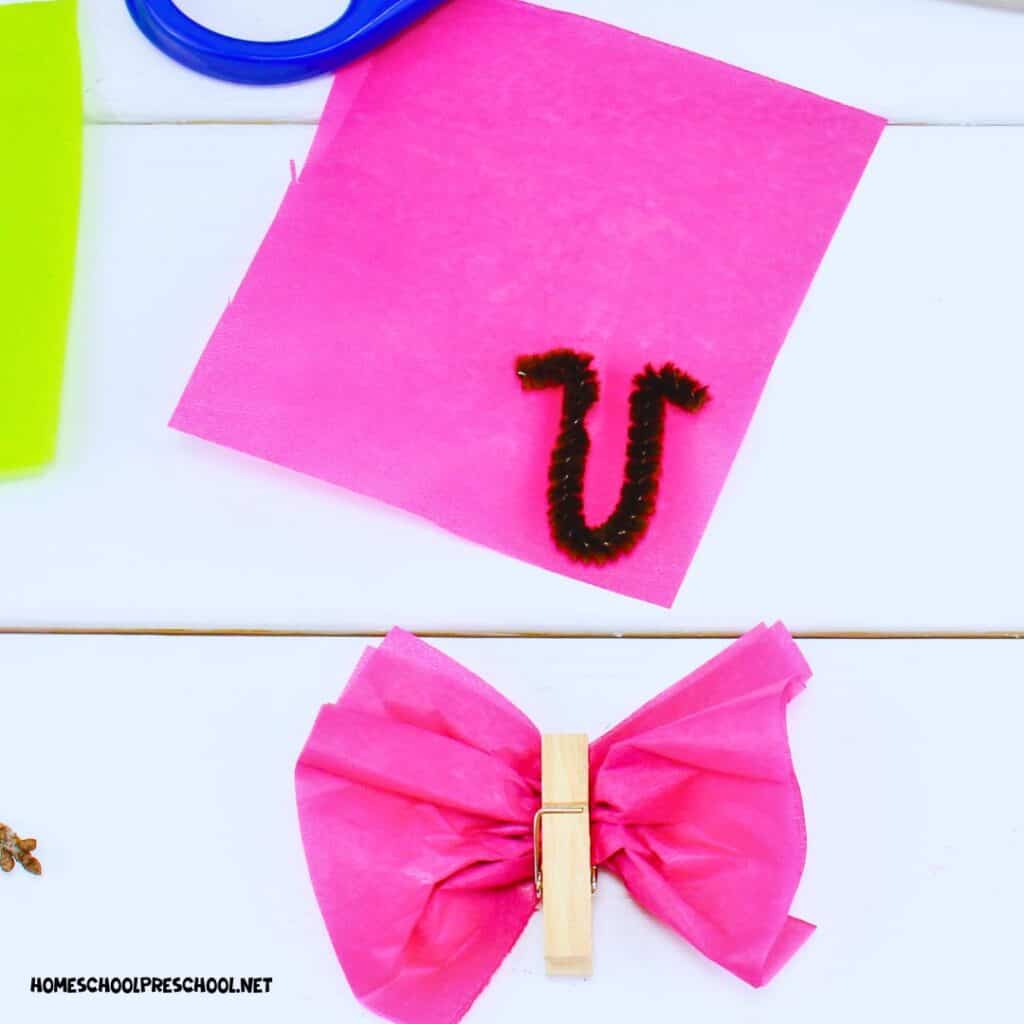
For the butterfly: Cut a small square of pink tissue paper. Pinch the tissue paper in the center to make it fan out on both ends. Clip the clothespin on the center to hold it in place. Make sure each side of the butterfly is even and the “wings” fan out.
Now, cut a small piece of the brown pipe cleaner. Fold it in half, and clip the clothespin to it so it resembles a butterfly’s antenna.
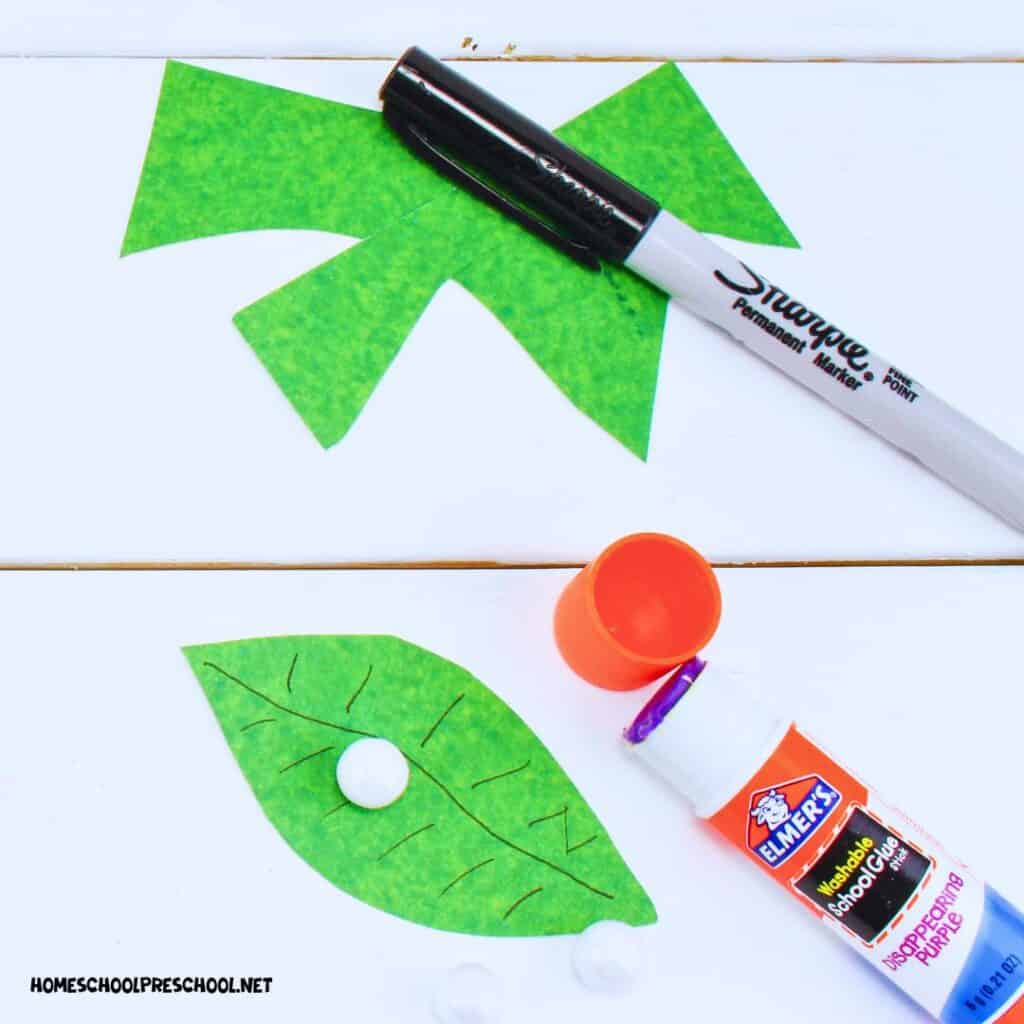
For the eggs: Cut out a small leaf from the light green tissue paper. Draw lines on it to resemble leaf veins. Glue a few Sixlets in the middle of the leaf.
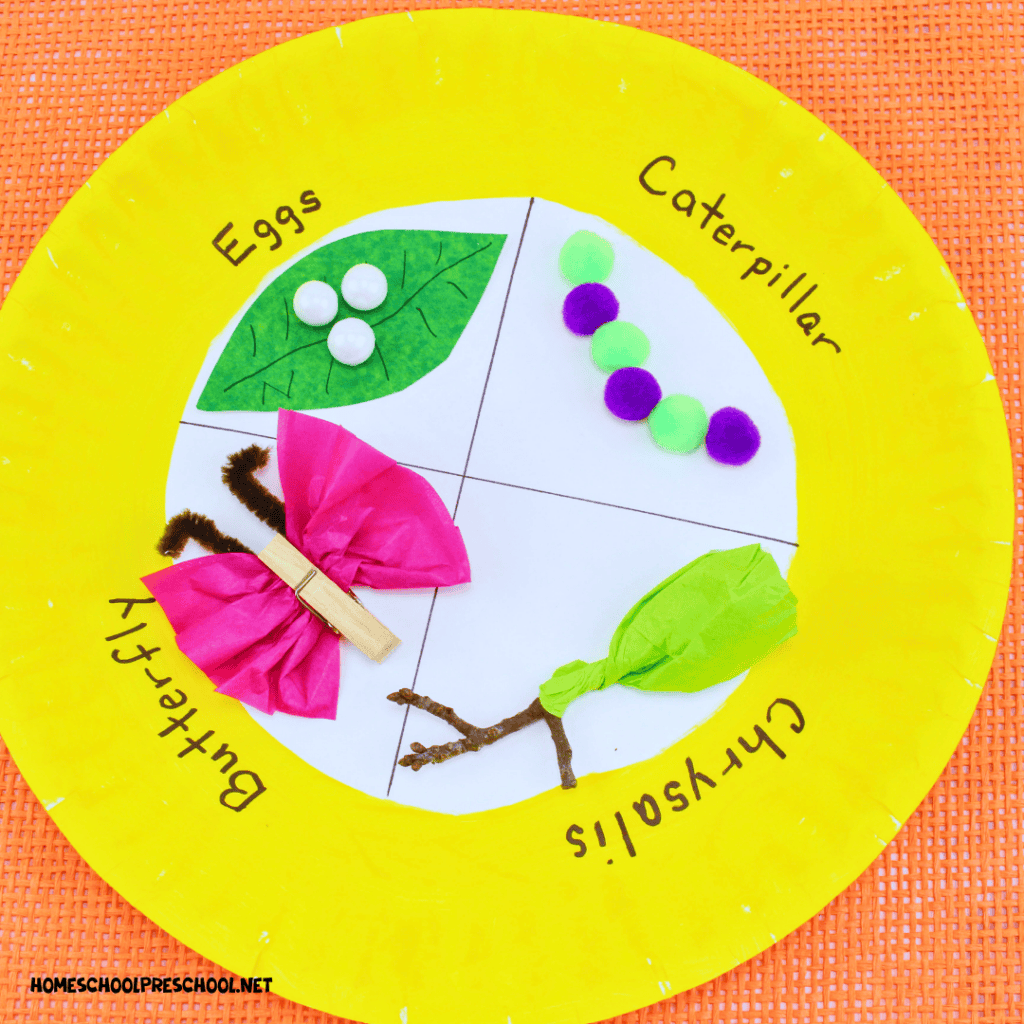
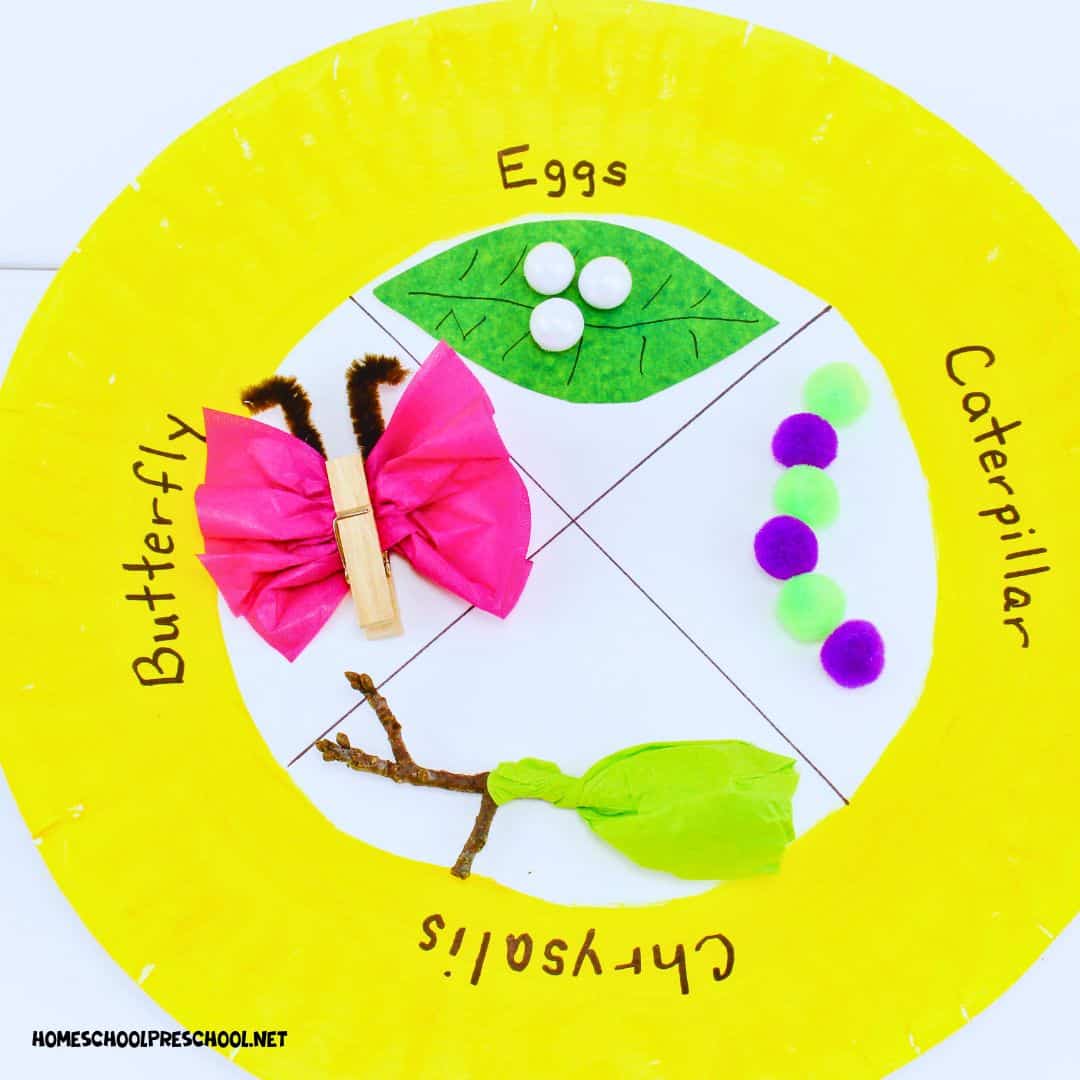
By this time, your plate should be dry. Draw a black “X” on the white flat part of the plate so you have four equal sections.
Glue the leaf onto one of the sections. Next to it, glue six mini pom poms so they resemble a caterpillar. Now, glue the cocoon onto the next section. Finally, add the butterfly to the last section.
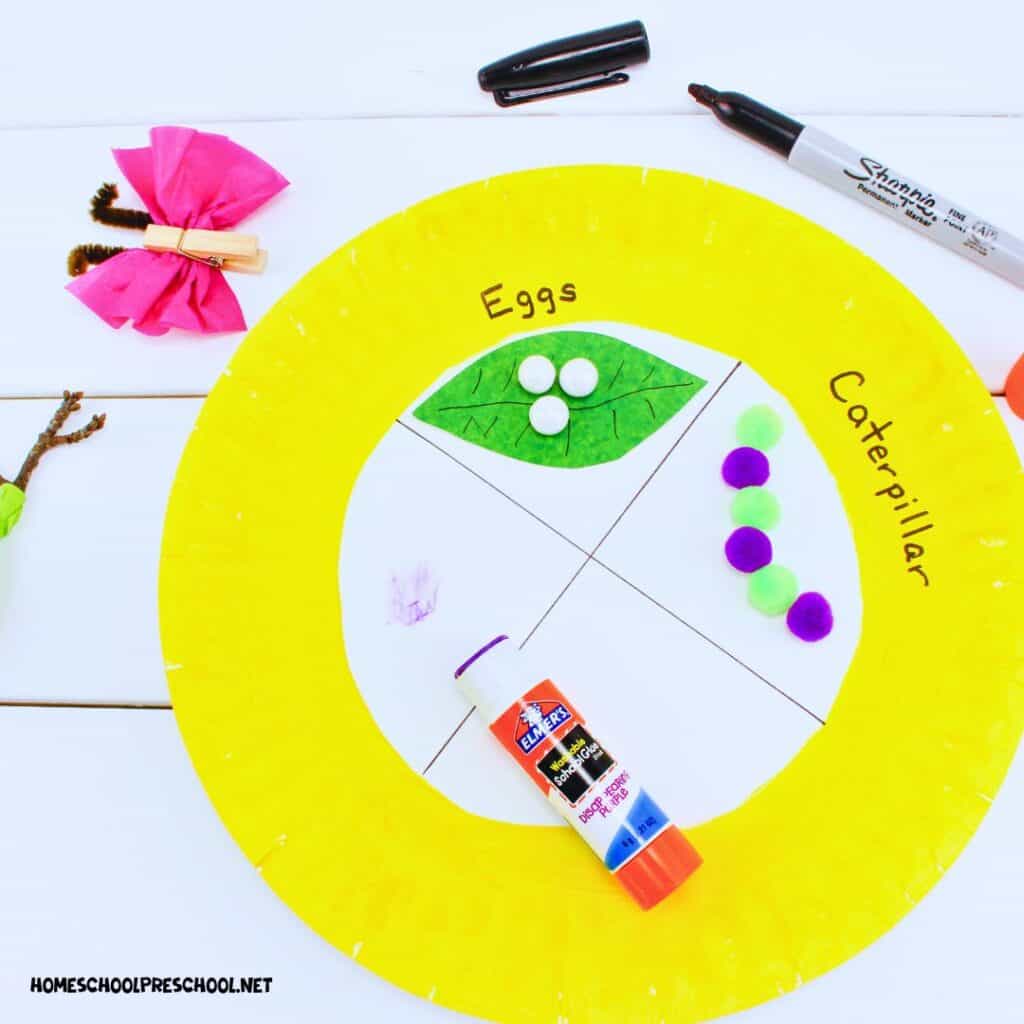
Use the black marker to title each section of the life cycle: eggs, caterpillar, chrysalis, and butterfly.

This is a great craft for your spring life cycle activities. It’s also a fun hands-on way to teach sequencing. Have your preschoolers use this craft to explain the life cycle of a butterfly to someone else.
Butterfly Ideas for Kids
Butterflies are such a magical topic for kids, and there are endless ways to expand on this craft! Whether you’re a homeschool parent or a teacher, these ideas will help deepen children’s understanding of the butterfly life cycle while keeping the learning fun and interactive. From creative art projects to hands-on science activities, there’s something for every curious little learner.
Butterfly Books for Kids
Books are a wonderful way to bring the magic of butterflies to life! From colorful picture books to simple science stories, there are so many great options to complement your butterfly life cycle lessons. These books will engage young readers and deepen their understanding of how butterflies grow and change.


Bluey: Butterflies – In this heartwarming story, Bluey and Bingo explore the garden and discover the joy of watching butterflies flutter around. Filled with fun and curiosity, this tale captures the simple wonders of nature and the bond between siblings.
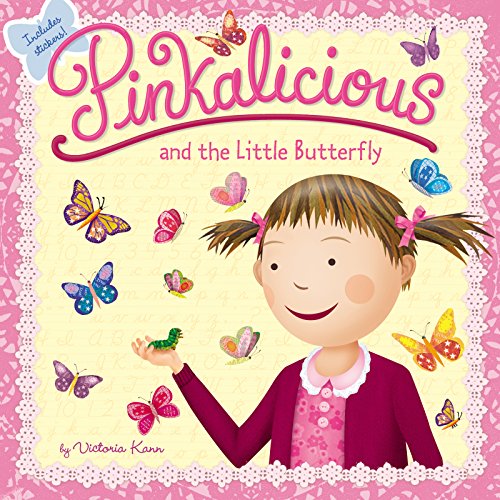
Pinkalicious and the Little Butterfly – Pinkalicious cares for a caterpillar, watching it transform into a beautiful butterfly. This sweet and colorful story teaches kids about responsibility and the magic of metamorphosis.
Usborne Pop-Up Butterflies – This stunning pop-up book brings the world of butterflies to life with vibrant, interactive pages. It’s a fun and engaging way for kids to learn about butterfly species, their habitats, and their life cycles.
Butterfly Crafts for Kids
Crafting is a wonderful way for kids to explore the beauty and science of butterflies! From creating colorful wings to designing their own butterfly life cycle, these hands-on projects encourage creativity while reinforcing learning. These butterfly crafts are perfect for adding even more fun and discovery to your butterfly-themed lessons.
- Butterfly Snack Craft
- Shape Butterfly Craft
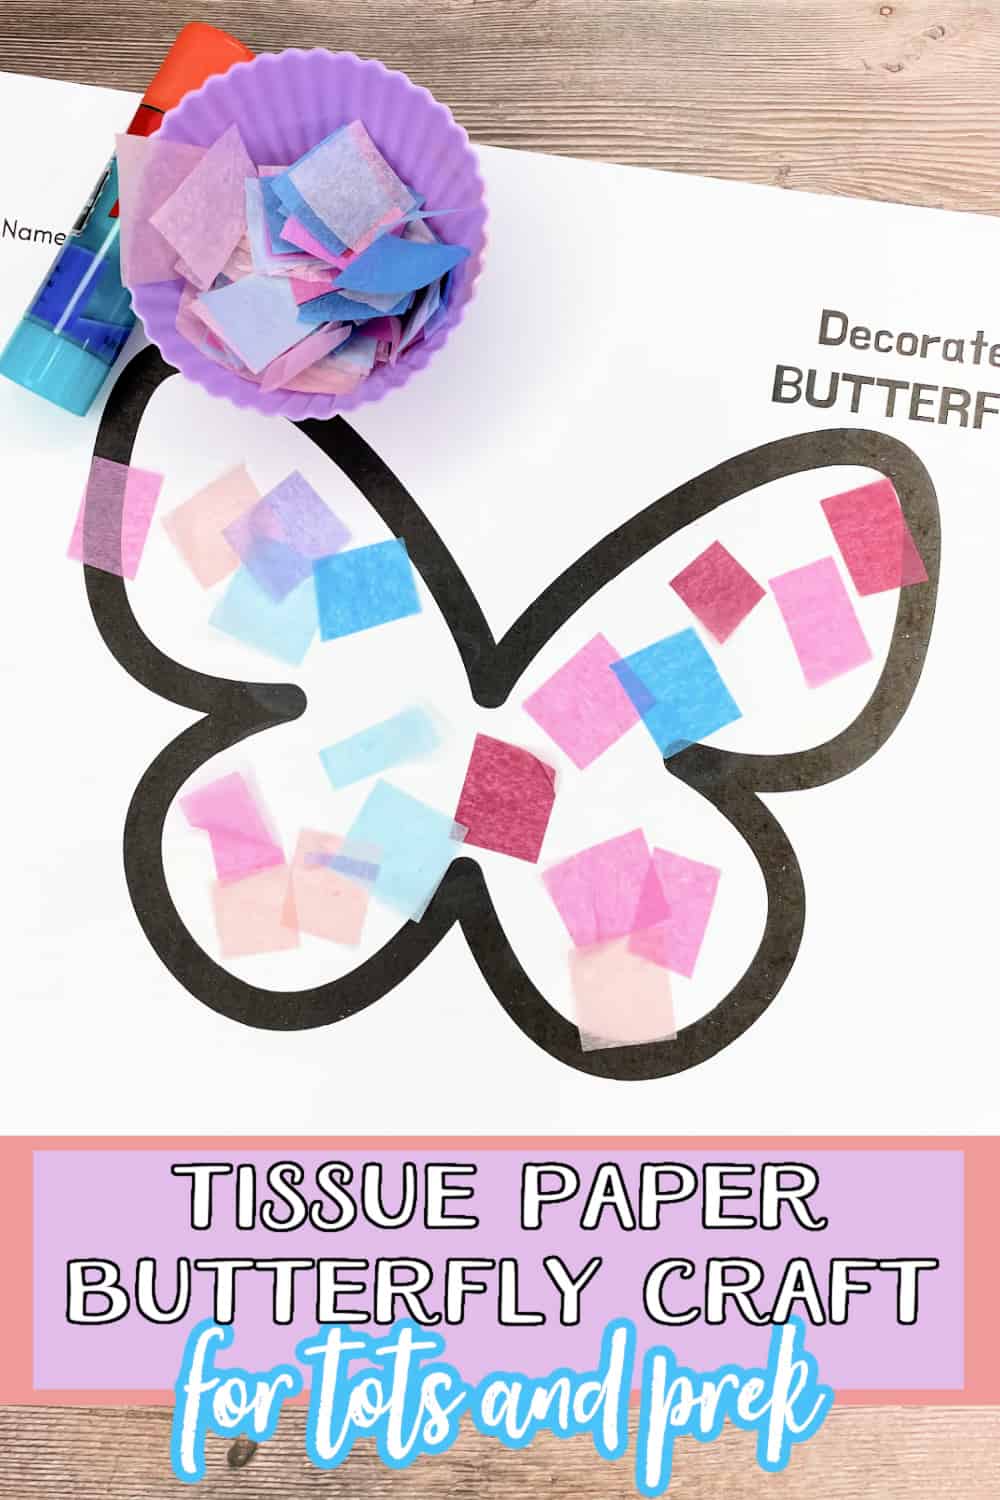
- Tissue Paper Butterfly
- Paper Plate Butterfly Craft
- Butterfly Life Cycle Craft with Pasta
Butterfly Printables for Kids
Printables are a fantastic way to make learning about butterflies both fun and educational! Whether it’s coloring pages, life cycle charts, or activity sheets, these resources help kids engage with the topic in creative ways. Use these butterfly-themed printables to complement your lessons or as independent activities for your little learners.
- B is for Butterfly
- Butterfly Life Cycle Paper Top
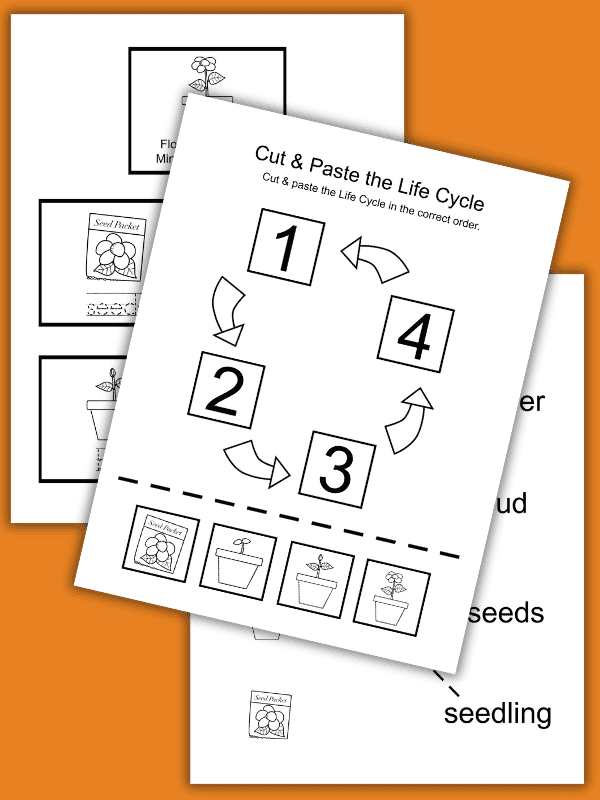
- Butterfly Life Cycle Worksheet
- Butterfly Life Cycle Printable Game
- Butterfly Math Worksheets for Kindergarten
FAQs About Butterfly Life Cycle Crafts
This craft is ideal for preschool and kindergarten-aged kids, usually between 3-6 years old. Younger kids may need a little extra help with cutting and gluing, but it’s a wonderful way for them to build fine motor skills. If you’re working with older kids, they can add more details or label each stage to make it more advanced.
Not at all! The craft uses simple supplies like a paper plate, construction paper, and glue—things you probably already have on hand. The focus is on creativity and learning, so there’s plenty of flexibility to make it work with what you have.
Butterflies are such an inspiring way to teach kids about nature, creativity, and the wonders of transformation. This life cycle of a butterfly craft makes learning interactive and fun, while also helping children develop important skills. Pair it with related activities, books, and printables for a complete butterfly-themed experience that’s perfect for preschoolers and kindergarteners.
Whether you’re a teacher or a parent, this activity is sure to spark curiosity and excitement about the natural world. So, gather your supplies, let creativity take flight, and enjoy exploring the magic of butterflies with your little learners!
Life Cycle of a Butterfly Craft
Materials
- Paper plate
- Craft paint
- Brown pipe cleaner
- Mini clothespin
- Small twig
- Mini pom poms
- Green construction paper
- TIssue paper light green and pink
- White Sixlets
- Glue stick
- Black Sharpie
Instructions
- Paint the entire outer rim of the inside of the paper plate. Leave the middle part white for the life cycle parts. Let the paint dry.
- Cut a small square of dark green tissue paper for the chrysalis. Form it into a cocoon shape over one end of the stick. Twist it so it closes around the stick.
- Cut a small square of pink tissue paper for the butterfly. Pinch the tissue paper in the center to make it fan out on both ends. Clip the clothespin on the center to hold it in place. Ensure each side of the butterfly is even and the “wings” fan out.
- Now, cut a small piece of the brown pipe cleaner. Fold it in half and clip the clothespin to it so it resembles a butterfly’s antenna.
- For the eggs: Cut out a small leaf from the light green tissue paper. Draw lines on it to resemble leaf veins. Glue a few Sixlets in the middle of the leaf.
- By this time, your plate should be dry. Draw a black “X” on the white flat part of the plate so you have four equal sections.
- Glue the leaf onto one of the sections. Next to it, glue six mini pom poms to resemble a caterpillar. Now, glue the cocoon onto the next section. Finally, add the butterfly to the last section.
- Use the black marker to title each life cycle section: eggs, caterpillar, chrysalis, and butterfly.

Tara is the brains behind Homeschool Preschool, where her journey from preschool and public school teacher to homeschooling mom of three fuels her passion for early childhood education. With a blend of expertise and firsthand experience, Tara’s writings offer practical tips and engaging resources to support families in creating meaningful learning adventures at home.

16 Comments