Life Cycle of a Butterfly Craft
This butterfly life cycle craft is a hands-on activity that helps kids explore the stages of a butterfly’s transformation while fostering creativity and fine motor skills.
Print
Pin
Materials
- Paper plate
- Craft paint
- Brown pipe cleaner
- Mini clothespin
- Small twig
- Mini pom poms
- Green construction paper
- TIssue paper light green and pink
- White Sixlets
- Glue stick
- Black Sharpie
Instructions
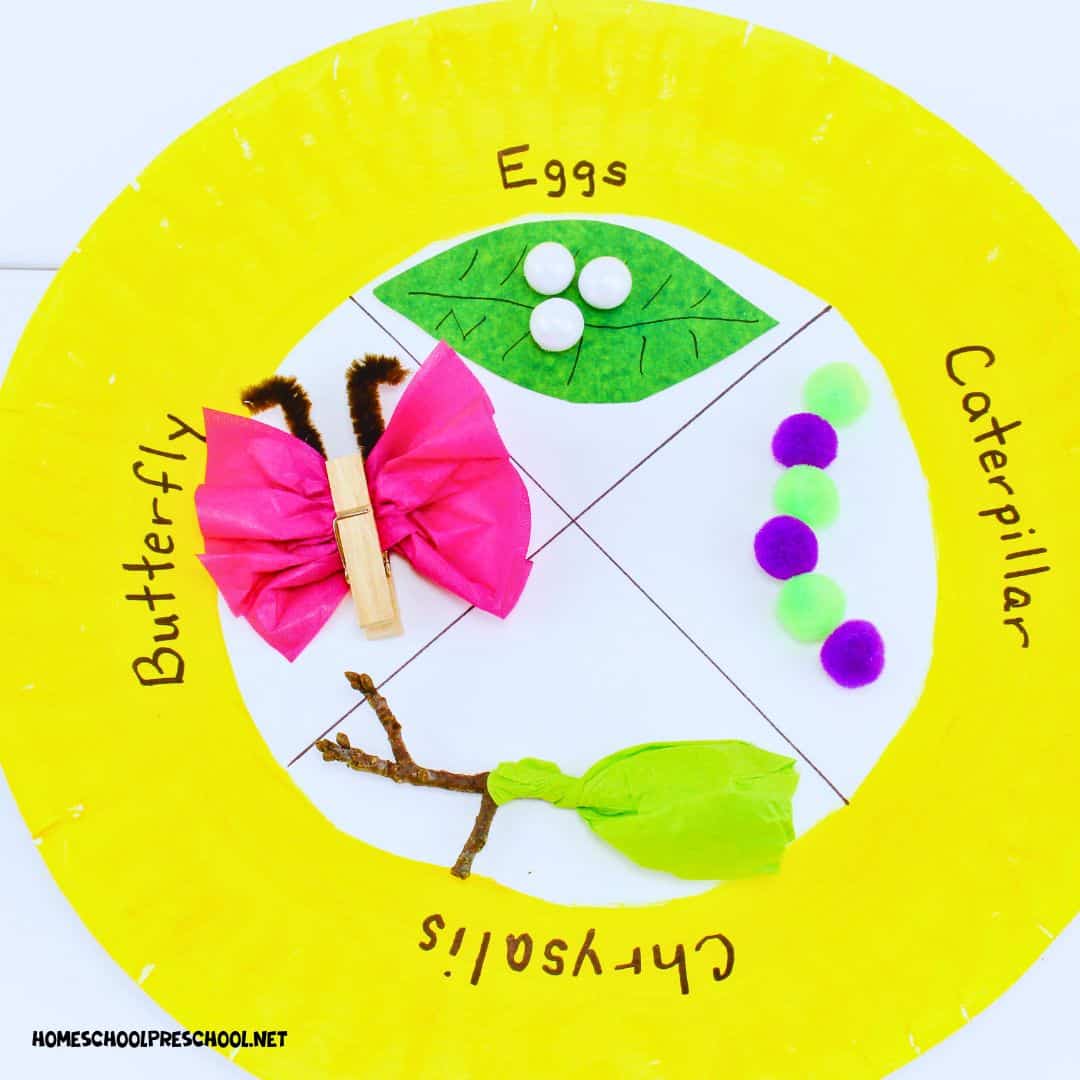
- Paint the entire outer rim of the inside of the paper plate. Leave the middle part white for the life cycle parts. Let the paint dry.
- Cut a small square of dark green tissue paper for the chrysalis. Form it into a cocoon shape over one end of the stick. Twist it so it closes around the stick.
- Cut a small square of pink tissue paper for the butterfly. Pinch the tissue paper in the center to make it fan out on both ends. Clip the clothespin on the center to hold it in place. Ensure each side of the butterfly is even and the “wings” fan out.
- Now, cut a small piece of the brown pipe cleaner. Fold it in half and clip the clothespin to it so it resembles a butterfly’s antenna.
- For the eggs: Cut out a small leaf from the light green tissue paper. Draw lines on it to resemble leaf veins. Glue a few Sixlets in the middle of the leaf.
- By this time, your plate should be dry. Draw a black “X” on the white flat part of the plate so you have four equal sections.
- Glue the leaf onto one of the sections. Next to it, glue six mini pom poms to resemble a caterpillar. Now, glue the cocoon onto the next section. Finally, add the butterfly to the last section.
- Use the black marker to title each life cycle section: eggs, caterpillar, chrysalis, and butterfly.