Butterfly Life Cycle Craft
By using different types of pasta, construction paper, and glue, you and your child can create a colorful and interactive way to learn about the stages of a butterfly's life cycle.
Print
Pin
Equipment
- black marker
- ruler
- Glue
- Scissors
Materials
- paper plates
- construction paper - green brown, blue
- white rice
- pasta - rotini shell, bow tie
Instructions
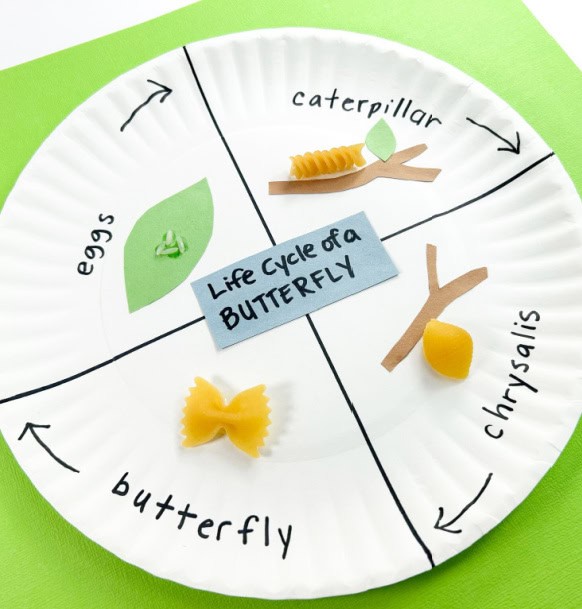
- To begin this craft, draw an "X" on the paper plate to divide the plate into four equal sections.
- Cut a leaf shape out of the green construction paper, and then glue it to one section of the paper plate. Glue rice to the leaf to represent eggs.
- Cut a tree branch from the brown paper and a small leaf from the green paper. Glue this in the section to the right of the "eggs". Paste a rotini noodle to the branch to represent the caterpillar.
- In the third section, glue a second brown tree branch. Then, glue a piece of shell pasta hanging from the branch. This is the chrysalis.
- Next, in the last section, glue the bow tie pasta. This is your adult butterfly.
- Then, draw arrows between the sections and label each one: eggs, caterpillar, chrysalis, and butterfly.
- Finally, write the words "Life Cycle of a Butterfly" on the blue paper and cut it out. Glue this to the center of the paper plate.
- That’s it - you've just made your own butterfly life cycle paper plate craft!