Easter Chick Craft
Discover the joy of Easter crafts! Learn how to make adorable hatching chicks with our step-by-step tutorial. Perfect for preschool fun.
Print
Pin
Materials
- Yellow construction paper
- Pastel foam sheets
- Paper cups
- Pencil
- Scissors
- Glue stick
- Cotton balls
- Google eyes
Instructions
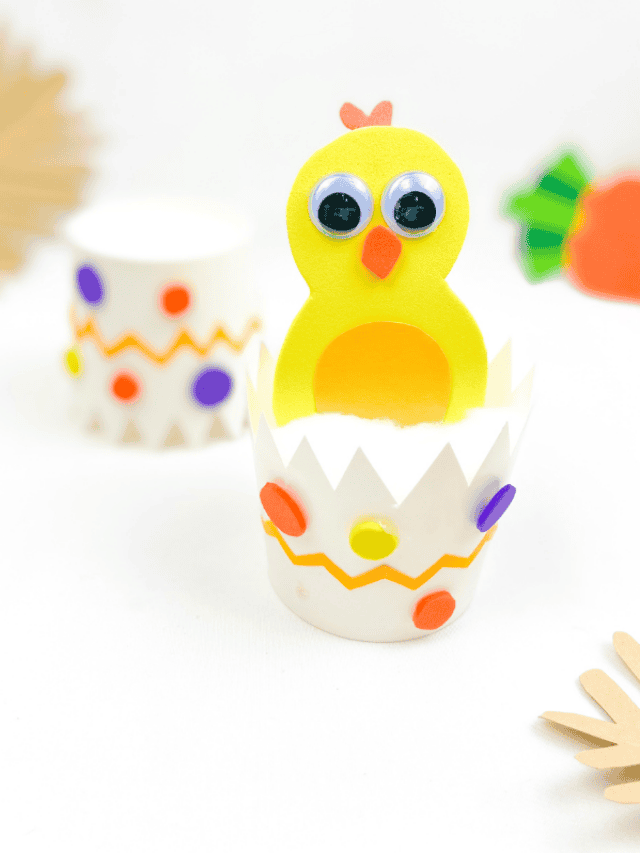
- Begin by cutting a zigzag pattern around the top rim of 2 paper cups. This creates a neat 'hatching' effect.
- Get your chick's body ready! Trace its outline onto yellow foam and then use scissors to cut it out carefully.
- Next, we'll give our chick a fluffy belly! Cut a small petal shape from your yellow construction paper. Cut the chick’s beak and little hair from an orange foam sheet
- For the egg, use the yellow paper to cut out two thin strips in a zigzag pattern.
- With a mix of your colored foam sheets, cut small circles to add a decorative touch to your craft.
- Create a fluffy nest for your chick with some cotton balls inside your cup.
- Then, it's time for your chick to hatch! Add the eyes, beak, hair, wings, and legs – and watch its personality shine!
- Decorate the paper cup with the small circles you cut out for a festive and colorful nest.